10GbE on SFP+ with Proxmox passthrough on a Dell R720
The Need for Speed
Recently I have been upgrading my homelab, complete with enterprise hardware and robust storage solutions. This solution is eventually intended to replace my ageing Synology RS3618xs as my primary system for applications and storage.
I wanted to ensure that after the build, fast storage devices would not be constrained by the speed of a 1Gb/s network. I decided to go to 10Gb/s where possible, which would take maximum hard drive speeds across the network from ~125MB/s to 1.25GB/s.
Options
The routers and switches I have only have SFP (not SFP+) ports, which mean a maximum of 1Gb/s. This meant I would need a new switch with SFP+ ports.
I have generally centralised my networking equipment on the Ubiquiti EdgeRouter/EdgeSwitch lines, so the logical product for me to acquire was the EdgeSwitch 16-XG. Unfortunately Ubiquiti EdgeSwitches have been exceedingly difficult to get since 2020, but luckily a model popped up on eBay and I was able to win the auction.
SFP+ Transceivers and Physical Media
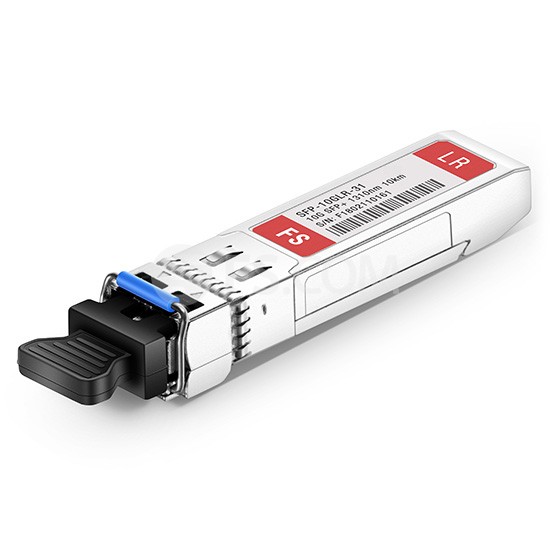
FS.com SFP+ transceiver. Image: FS.com.
Small Form-factor Pluggable (SFP+) network interfaces can be either copper (RJ45S) with a high grade cable such as category 6a, 7, 8 — or you can get fibre. I was only interested in fibre, because it was new for me and I wanted to learn about how to use it with hands-on experience.
Fibre
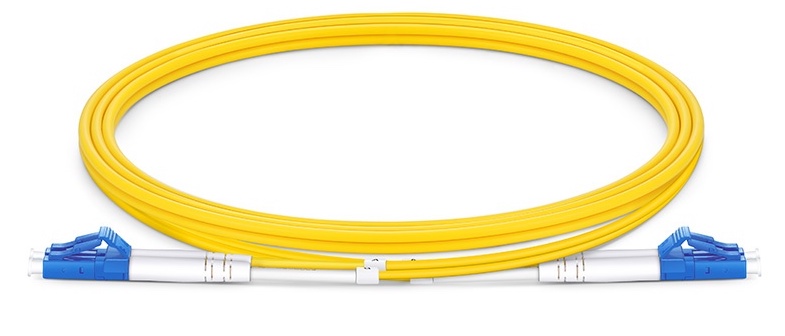
FS.com fibre patch cable. Image: FS.com.
Fibre optic cables come in 2 main categories: single-mode or multi-mode. The “mode” refers to the number of beams of light going down the fibre at the same time. Single mode is generally a harder technology to manufacture and make related parts for, and is generally more expensive than an equivalent multi-mode cable, but supports further distances and higher speeds. The benefits of single mode were not really applicable for me in this build, but I decided to get it anyway in case I decided to start running cables through my house’s walls, in which case I would want a future-proof technology.
The exact products I bought were:
- FS.com LC UPC to LC UPC OS2 patch cable
- Dell-compatible 1310nm transceivers
- Ubiquiti-compatiable 1310nm transceivers
I also acquired some SFP (not SFP+) transceivers to provide fibre connectivity between some switches that only had 1Gb/s SFP ports.
SFP+ PCIE card
With 2 Dell R720s available, the missing piece was an SFP+ port to plug into my servers. I bought an Intel X520-DA2 PCIE card for each of my servers, theoretically giving me end-to-end connectivity at 10Gb/s for each of my enterprise servers.
Making the SFP+ module work
The PCIE card was recognised on a reboot (or two) of the Dell machines, but near the end of the boot sequence it would complain that ixgbe failed to initialize because an unsupported sfp+ module type was detected, and would show NO-CARRIER when listing ip interfaces on the command line.
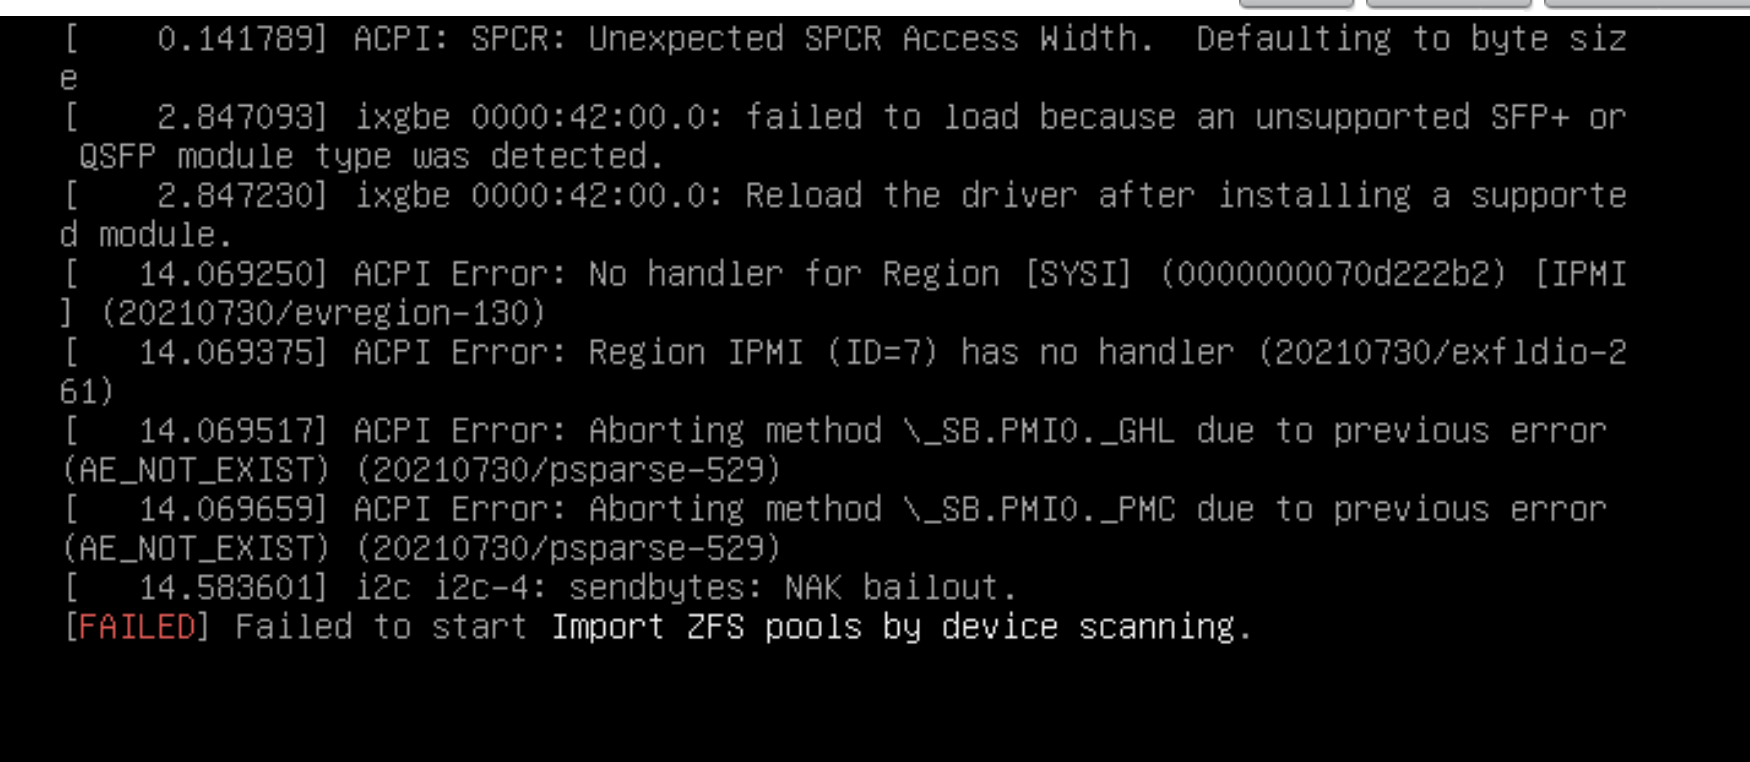
Error message shown from iDRAC console.
This is not an uncommon issue when trying to get SFP+ working on Dell machines, but I was surprised to come across it when everything I had bought had been advertised as compatible with Dells.
From https://www.serveradminz.com/blog/unsupported-sfp-linux/, the first steps to remedy this problem are:
[root@xyz ~]# vi /etc/default/grub- In the text file, edit
GRUB_CMDLINE_LINUX="ixgbe.allow_unsupported_sfp=1"(Adding the parameter to the line GRUB_CMDLINE_LINUX=”” ) [root@xyz ~]# grub-mkconfig -o /boot/grub/grub.cfg(Upgrading the grub with the command)[root@xyz ~]# rmmod ixgbe && modprobe ixgbereboot
After this the PCIE card did not log errors about compatability on boot. If you see no errors (usually very close to the end of the boot process) then you should be good to move on to the next step.
Setting up the network
I needed to tell the host OS, Proxmox in my case, about the new interfaces available to it. As I wanted all traffic to pass through the fibre, I decided to deactive the ethernet interface at the same time.
The critical file to (carefully) edit was /etc/networks/interfaces.
Before editing, it looks something like this:
# network interface settings; autogenerated
# Please do NOT modify this file directly, unless you know what
# you're doing.
#
# If you want to manage parts of the network configuration manually,
# please utilize the 'source' or 'source-directory' directives to do
# so.
# PVE will preserve these directives, but will NOT read its network
# configuration from sourced files, so do not attempt to move any of
# the PVE managed interfaces into external files!

auto lo
iface lo inet loopback

iface eno1 inet manual

iface eno2 inet manual

iface eno3 inet manual

iface eno4 inet manual

iface enp66s0f0 inet manual

iface enp66s0f1 inet manual

auto vmbr0
iface vmbr0 inet static
	bridge-ports eno1
	bridge-stp off
	bridge-fd 0
	bridge-vlan-aware yes
	bridge-vids 2-4094

auto vmbr0.9
iface vmbr0.9 inet static
	address 192.168.35.16/24
	gateway 192.168.35.1
After my edits, I looked like this:
# network interface settings; autogenerated
# Please do NOT modify this file directly, unless you know what
# you're doing.
#
# If you want to manage parts of the network configuration manually,
# please utilize the 'source' or 'source-directory' directives to do
# so.
# PVE will preserve these directives, but will NOT read its network
# configuration from sourced files, so do not attempt to move any of
# the PVE managed interfaces into external files!

auto lo
iface lo inet loopback

iface eno1 inet manual

iface eno2 inet manual

iface eno3 inet manual

iface eno4 inet manual

iface enp66s0f0 inet manual

iface enp66s0f1 inet manual

#auto vmbr0
#iface vmbr0 inet static
#	bridge-ports eno1
#	bridge-stp off
#	bridge-fd 0
#	bridge-vlan-aware yes
#	bridge-vids 2-4094
#
#auto vmbr0.9
#iface vmbr0.9 inet static
#	address 192.168.35.116/24
#	gateway 192.168.35.1

# NOTE: I have changed the IP address above before commenting it out

auto vmbr1
iface vmbr1 inet static
	bridge-ports enp66s0f0
	bridge-stp off
	bridge-fd 0
	bridge-vlan-aware yes
	bridge-vids 2-4094
	pre-up ip link set vmbr1 mtu 9000

auto vmbr1.9
iface vmbr1.9 inet static
	address 192.168.35.16/24
	gateway 192.168.35.1
You will see that I copied the structure of the vmbr0 bridge into a new bridge called vmbr1 for the fibre connection, and commented out vmbr0. A quick systemctl restart networking to restart networking (usually takes less than 30 seconds, occasionally a little longer) and your interface should be up.
You can check with ip a and ip addr list. The fibre connections were named something like enp66s0f0.
Jumbo Frames
A frame is the unit of data sent by the ethernet protocol. The size of the frame can be extended, which can help to improve speeds at high bandwiths such as 10Gb/s. For this setting to work, it needs to be set to 9000 all the way through the “stack”.
In my case, for each machine, this meant setting the MTU 3 times:
# ip link set fwbr100i0 mtu 9000
# ip link set vmbr1 mtu 9000
# ip link set vmbr1.9 mtu 9000
To test the MTU setting, you can modify ping arguments to send a jumbo-frame ping: ping -M do -s 8972.
References:
https://blah.cloud/networks/test-jumbo-frames-working/
https://linuxconfig.org/how-to-enable-jumbo-frames-in-linux
VM Changes
If you are using Proxmox, you will need to set each VM’s network to vmbr1 from vmbr0. It will not start if its network bridge no longer exists.
Speed test results
Testing from machine to machine (bare metal), I was able to achieve the maximum expected line rate.
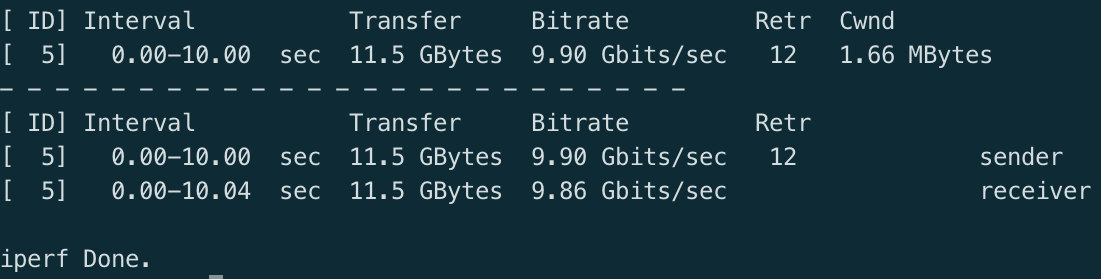
Testing across the SFP+ switches showing 9.9 Gb/s.
Testing across virtual machines unfortunately yielded slower results, around 7.5 Gb/s. I am working to understand and resolve this next.