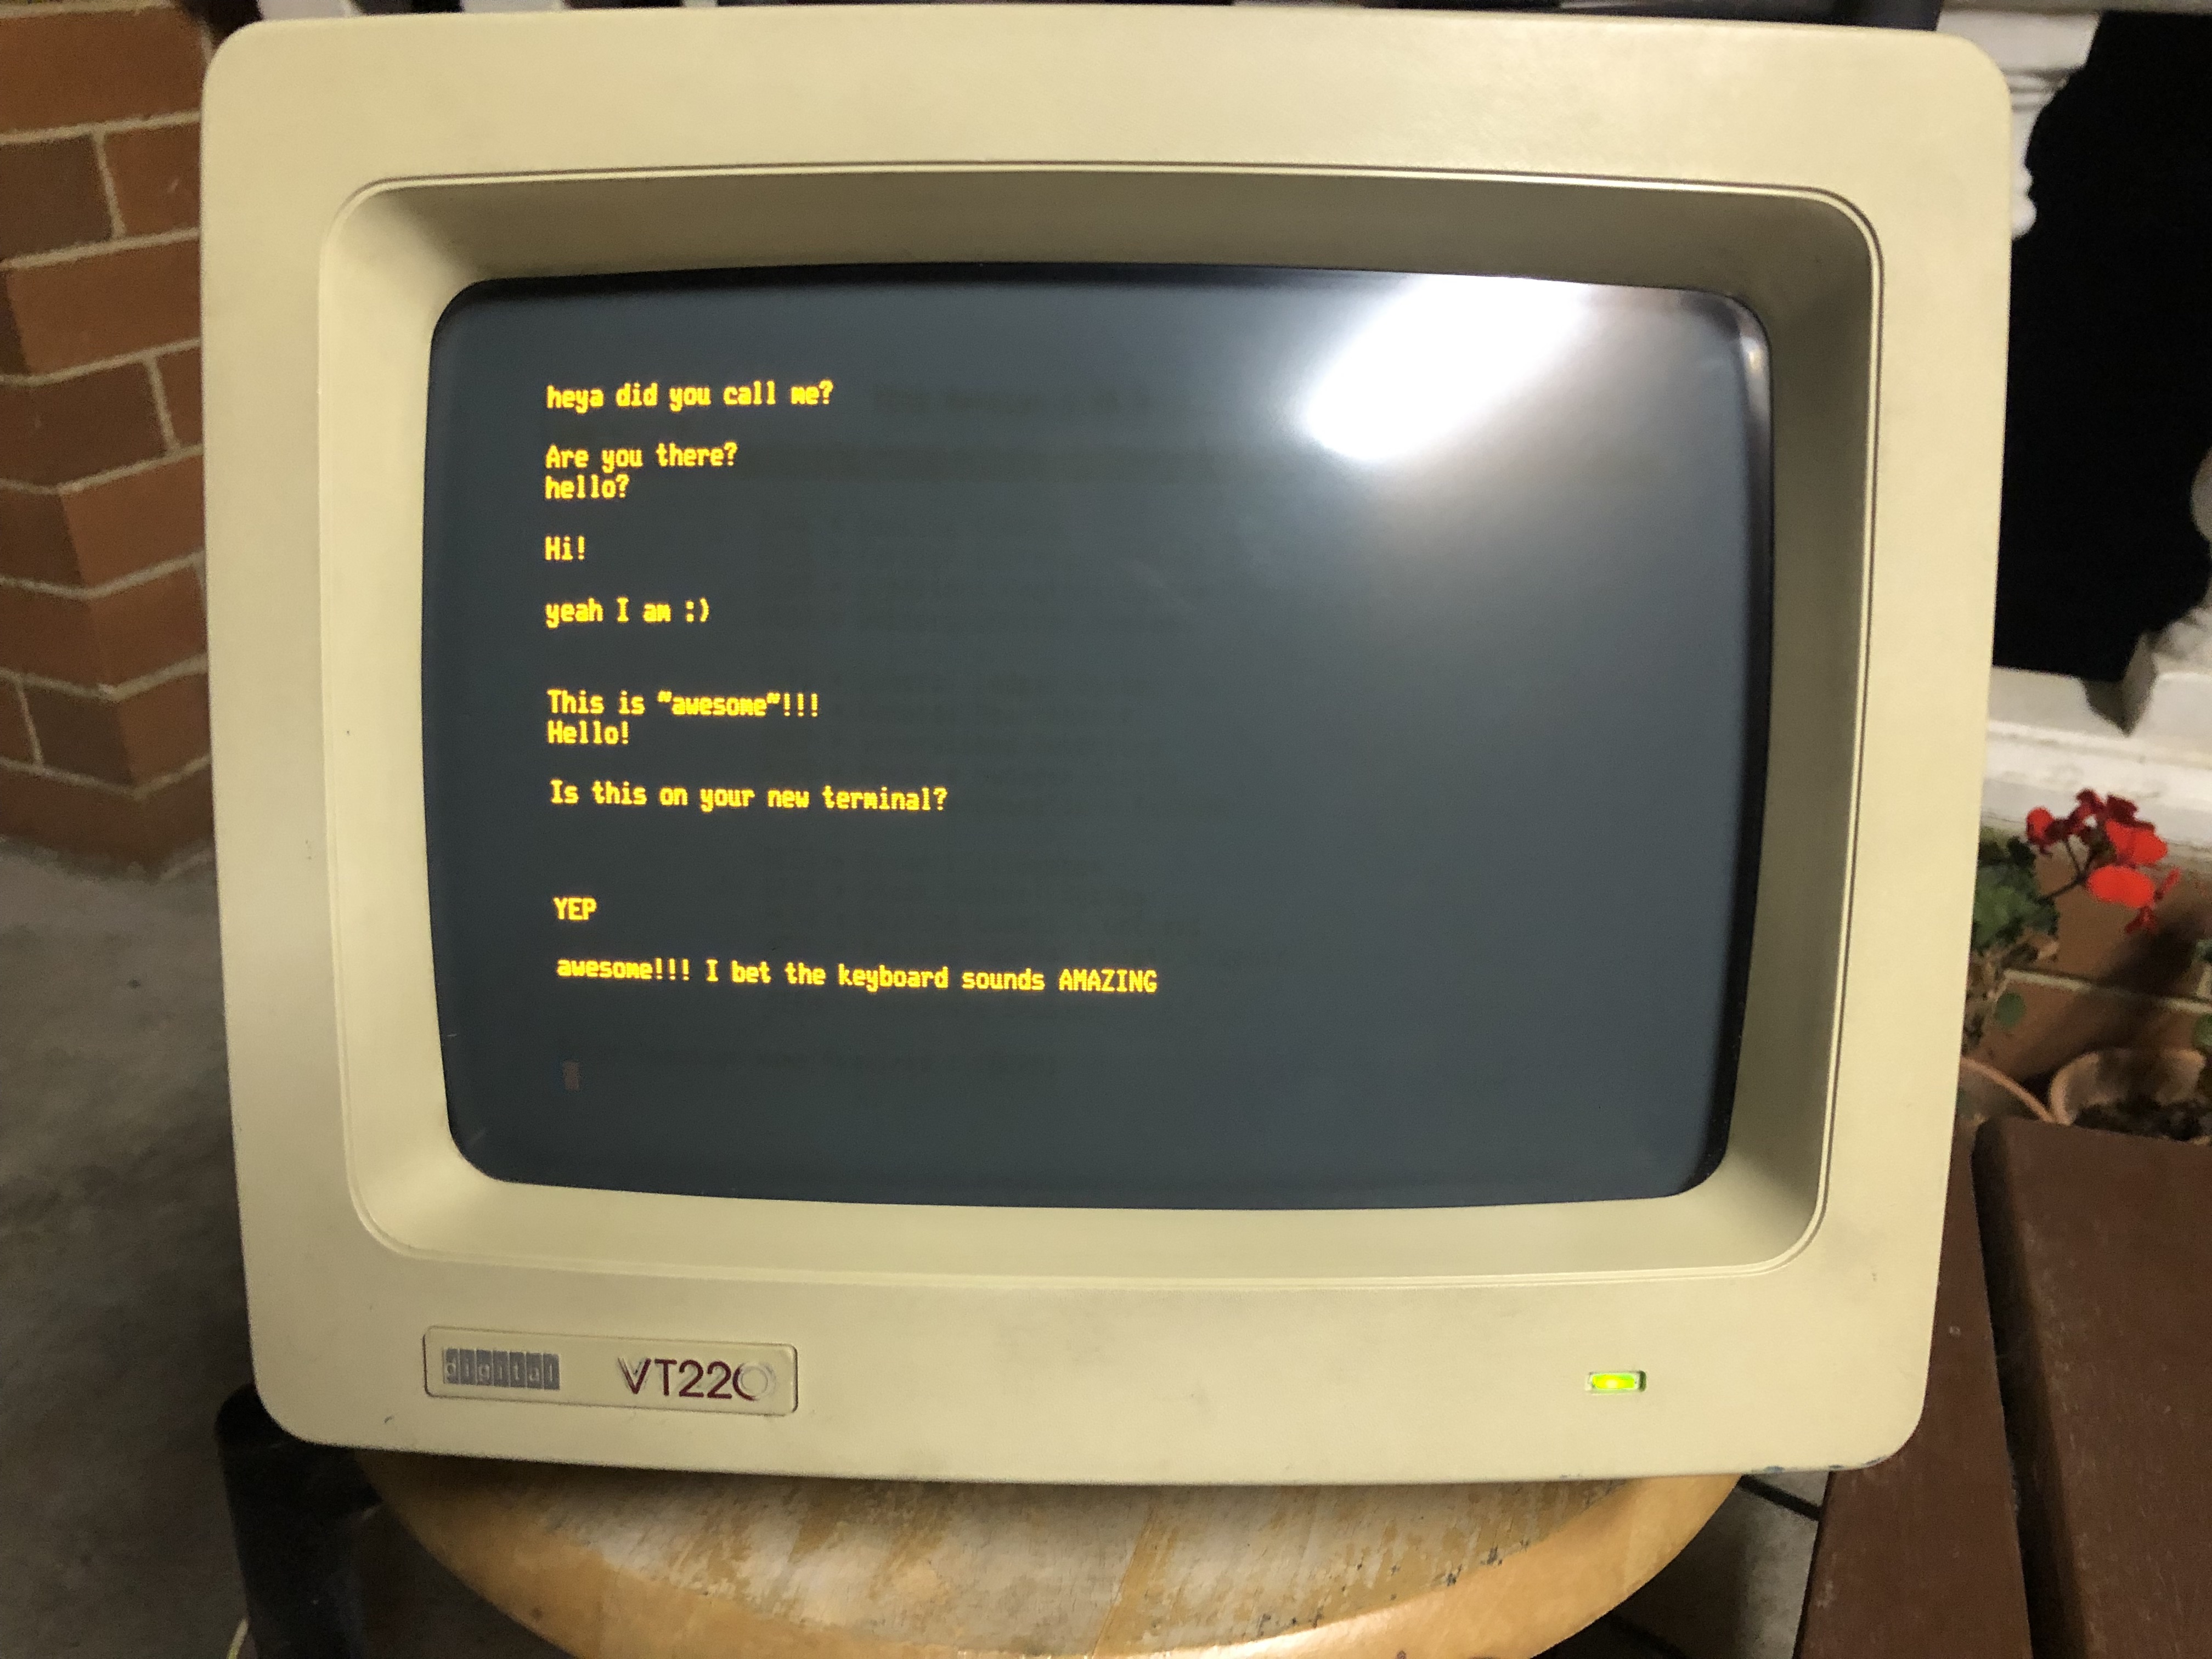
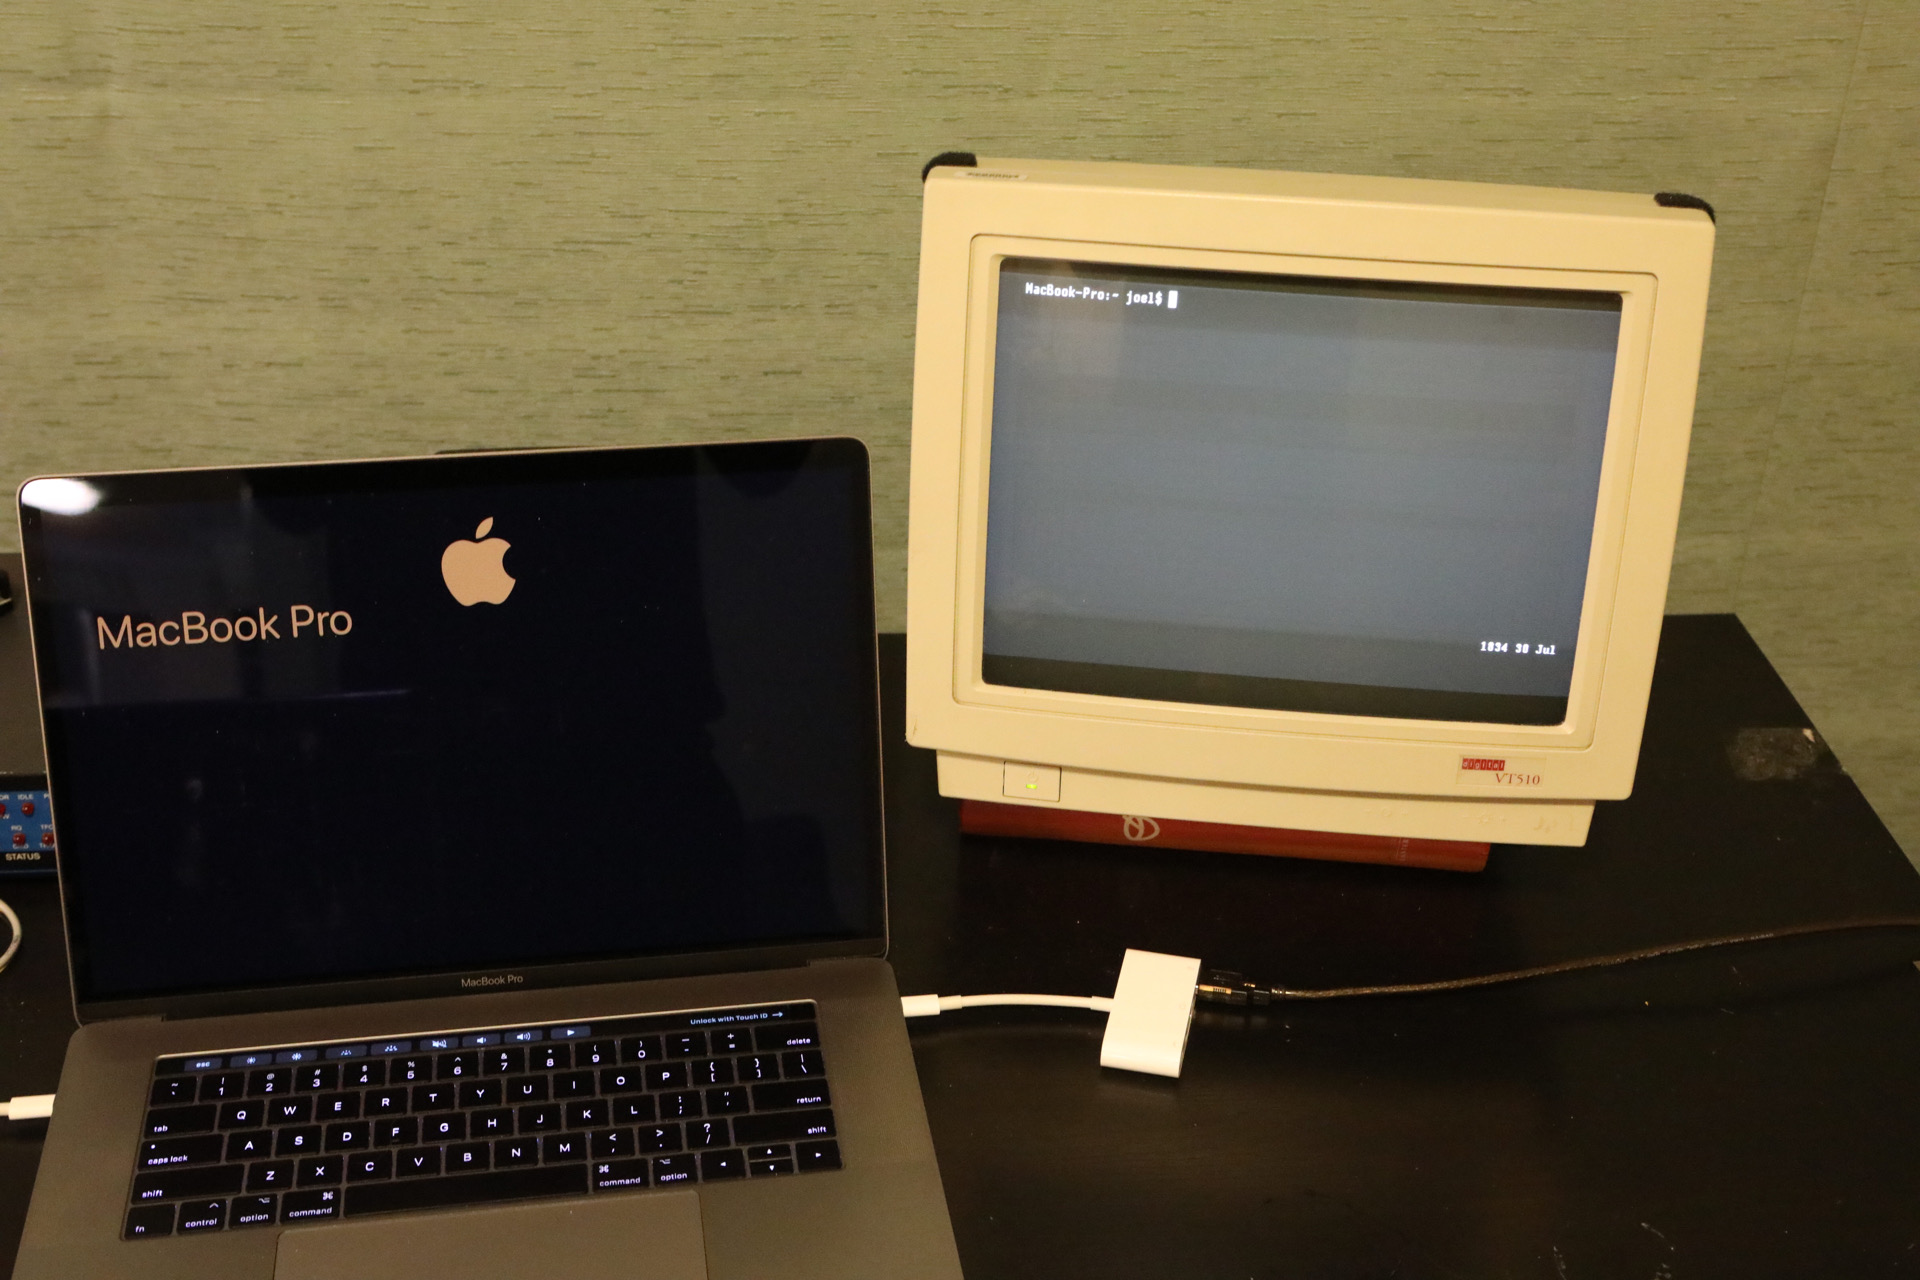
<?xml version="1.0" encoding="utf-8"?><feed xmlns="http://www.w3.org/2005/Atom" ><generator uri="https://jekyllrb.com/" version="4.2.2">Jekyll</generator><link href="https://blog.joelbuckley.com.au/feed.xml" rel="self" type="application/atom+xml" /><link href="https://blog.joelbuckley.com.au/" rel="alternate" type="text/html" /><updated>2026-07-10T20:04:49+00:00</updated><id>https://blog.joelbuckley.com.au/feed.xml</id><title type="html">Joel Buckley</title><subtitle>This is the blog of Joel Buckley, an engineer from Melbourne, Australia.</subtitle><entry><title type="html">Bash One-Liners</title><link href="https://blog.joelbuckley.com.au/2024/12/bash-one-liners" rel="alternate" type="text/html" title="Bash One-Liners" /><published>2024-12-31T00:00:00+00:00</published><updated>2024-12-31T00:00:00+00:00</updated><id>https://blog.joelbuckley.com.au/2024/12/bash-one-liners</id><author><name></name></author><category term="Computing" /><category term="bash" /><category term="scripting" /><summary type="html"><![CDATA[This is a collection of bash one-liners (or, small multi-liners) that I have found useful at one time or another. I will use this as my one-stop reference and update it as others occur to me. Bash process control Keep downloading a file I used this recently to download a large file that would abruptly halt over an unstable connection. curl -C continues the download, where the server supports this. The exit code of curl when my download failed was consistently 18, so I just kept continuing the download until it wouldn’t return with 18. As you can see, the real trick is to continually export the exit code for evaluation in the loop. export ec=18; while [ $ec -eq 18 ]; do curl -O -C - "https://ftp.fau.de/kiwix/zim/wikipedia/wikipedia_en_all_maxi_2018-10.zim"; export ec=$?; done The watch command For when you want to watch the results to a mysql command. I use this to watch the temperate downstairs, which gets logged every 1 minute or so into a database. $ watch mysql -t -h &lt;hostname&gt; -u &lt;username&gt; -p&lt;password&gt; &lt;dbname&gt; -e \"select \* from temperatures where location = \'downstairs\' order by timestamp desc limit 20\;\" Docker Finding where the big log files are Sometimes I forget the requirement to configure logging in Docker’s daemon.json file before I create a docker container on a new host. This means that the log file will be written to endlessly, until I realise the mistake. To see the log file sizes of running containers, a nice one-liner is: sudo du -ch $(docker inspect --format='' $(docker ps -qa)) | sort -h | sed 's/\/var\/lib\/docker\/containers\///' | awk '{if ($1 != "total") {split($NF, arr, "/"); id = arr[1]; print $1 " " $2 " " id} else {print $1 " " $2 " " $1}}' | while read size unit id; do if [ "$size" != "total" ]; then name=$(docker ps --format "" --filter id=$id); echo "$size $unit $name"; else echo "$size $unit $id"; fi; done This is a beast but full credit to this post on stackoverflow for it. If you prefer a smaller command, sudo du -h $(docker inspect --format='' $(docker ps -qa)) will give you the same information but without the docker container names.]]></summary></entry><entry><title type="html">TrueNAS on MacOS</title><link href="https://blog.joelbuckley.com.au/2024/11/truenas-mac-os" rel="alternate" type="text/html" title="TrueNAS on MacOS" /><published>2024-11-30T00:00:00+00:00</published><updated>2024-11-30T00:00:00+00:00</updated><id>https://blog.joelbuckley.com.au/2024/11/truenas-mac-os</id><content type="html" xml:base="https://blog.joelbuckley.com.au/2024/11/truenas-mac-os"><![CDATA[<p>This post is to highlight some advanced TrueNAS features to make your MacOS machine work better with with SMB/CIFS file shares on TrueNAS.</p>

<p class="panel-note top-padding"><b>Note:</b> Since updating to Ventura 13.7.2 I have found the settings below to be counterproductive, and I had to remove them for SMB operations to work again.</p>

<h1 id="server-message-block-smb-file-sharing-protocol">Server Message Block (SMB) File Sharing Protocol</h1>
<p><a href="https://www.apple.com/media/us/osx/2013/docs/OSX_Mavericks_Core_Technology_Overview.pdf">Since 2013</a> in Mavericks (<em>eleven</em> years ago as I write this), Apple has preferred the SMB file sharing protocol over its own Apple Filing Protocol (AFP). Specifically, SMB2 as mentioned in the linked PDF.</p>

<p>This has not been without some amount of friction, as SMB was initially made to work primarily with IBM-compatible installations such as Windows and DOS. Interoperability with MacOS is generally fine, but can have some sharp edges.</p>

<h1 id="multiple-mounts">Multiple Mounts</h1>
<p>I had difficulty mounting more than one volume from TrueNAS over SMB, with the same user, and the exact same permissions on the folders. <strong>The solution<sup id="fnref:multiple-mounts"><a href="#fn:multiple-mounts" class="footnote" rel="footnote" role="doc-noteref">1</a></sup> for me was to disable “Enable Alternate Data Streams” on all of the shares I wanted to be able to mount at the same time as another share.</strong></p>

<p>The link referred to suggests disabling “Enable Apple SMB2/3 Protocol Extensions” but I did not need to do this. In fact, it meant that my Time Machine backups to the TrueNAS machine did not work until I re-enabled this setting.</p>

<h1 id="long-names">Long Names</h1>

<p>Sometimes my files have long names. When copying this nominatively blessed data from one share to another, I received an error from MacOS stating that, “The file name you specified is not valid or too long”. The files were both coming from and going to the same file server so this seemed a little unreasonable.</p>

<p>I found <a href="https://www.truenas.com/community/threads/smb-file-name-not-valid-or-too-long.82792/#post-603999">a blog post</a> on the very useful <a href="https://www.truenas.com/community/">retired TrueNAS forums (RIP)</a> that provided <strong>two lines of configuration to be added to each of the shares’ auxilliary parameters to make long names work<sup id="fnref:long-names"><a href="#fn:long-names" class="footnote" rel="footnote" role="doc-noteref">2</a></sup>:</strong></p>
<div class="language-plaintext highlighter-rouge"><div class="highlight"><pre class="highlight"><code>streams_xattr:store_stream_type = yes
streams_xattr:prefix = user.DosStream.
</code></pre></div></div>

<p>Once I had added this to the shares and <strong>restarted SMB</strong>, I was able to use the SMB service to copy these files without issue.</p>

<h1 id="references">References:</h1>
<div class="footnotes" role="doc-endnotes">
  <ol>
    <li id="fn:multiple-mounts">
      <p><a href="https://www.reddit.com/r/truenas/comments/rjjisl/macos_and_truenas_scale_odd_issue_with_smb/">https://www.reddit.com/r/truenas/comments/rjjisl/macos_and_truenas_scale_odd_issue_with_smb/</a> <a href="#fnref:multiple-mounts" class="reversefootnote" role="doc-backlink">&#8617;</a></p>
    </li>
    <li id="fn:long-names">
      <p><a href="https://www.truenas.com/community/threads/smb-file-name-not-valid-or-too-long.82792/#post-603999">https://www.truenas.com/community/threads/smb-file-name-not-valid-or-too-long.82792/#post-603999</a> <a href="#fnref:long-names" class="reversefootnote" role="doc-backlink">&#8617;</a></p>
    </li>
  </ol>
</div>]]></content><author><name></name></author><category term="Computing" /><category term="geospatial" /><category term="mapping" /><category term="osm" /><summary type="html"><![CDATA[This post is to highlight some advanced TrueNAS features to make your MacOS machine work better with with SMB/CIFS file shares on TrueNAS. Note: Since updating to Ventura 13.7.2 I have found the settings below to be counterproductive, and I had to remove them for SMB operations to work again. Server Message Block (SMB) File Sharing Protocol Since 2013 in Mavericks (eleven years ago as I write this), Apple has preferred the SMB file sharing protocol over its own Apple Filing Protocol (AFP). Specifically, SMB2 as mentioned in the linked PDF. This has not been without some amount of friction, as SMB was initially made to work primarily with IBM-compatible installations such as Windows and DOS. Interoperability with MacOS is generally fine, but can have some sharp edges. Multiple Mounts I had difficulty mounting more than one volume from TrueNAS over SMB, with the same user, and the exact same permissions on the folders. The solution1 for me was to disable “Enable Alternate Data Streams” on all of the shares I wanted to be able to mount at the same time as another share. The link referred to suggests disabling “Enable Apple SMB2/3 Protocol Extensions” but I did not need to do this. In fact, it meant that my Time Machine backups to the TrueNAS machine did not work until I re-enabled this setting. Long Names Sometimes my files have long names. When copying this nominatively blessed data from one share to another, I received an error from MacOS stating that, “The file name you specified is not valid or too long”. The files were both coming from and going to the same file server so this seemed a little unreasonable. I found a blog post on the very useful retired TrueNAS forums (RIP) that provided two lines of configuration to be added to each of the shares’ auxilliary parameters to make long names work2: streams_xattr:store_stream_type = yes streams_xattr:prefix = user.DosStream. Once I had added this to the shares and restarted SMB, I was able to use the SMB service to copy these files without issue. References: https://www.reddit.com/r/truenas/comments/rjjisl/macos_and_truenas_scale_odd_issue_with_smb/ &#8617; https://www.truenas.com/community/threads/smb-file-name-not-valid-or-too-long.82792/#post-603999 &#8617;]]></summary></entry><entry><title type="html">Geospatial Information Wants to be Free, And It Is</title><link href="https://blog.joelbuckley.com.au/2024/09/osm-queries" rel="alternate" type="text/html" title="Geospatial Information Wants to be Free, And It Is" /><published>2024-09-26T00:00:00+00:00</published><updated>2024-09-26T00:00:00+00:00</updated><id>https://blog.joelbuckley.com.au/2024/09/osm-queries</id><content type="html" xml:base="https://blog.joelbuckley.com.au/2024/09/osm-queries"><![CDATA[<h1 id="openstreetmap">Openstreetmap</h1>

<p><a href="https://openstreetmap.org/">Openstreetmap</a> is a tremendous resource that has a wealth and quality of information that often surpasses Google Maps, the web’s de-facto mapping solution since 2005. It contains information that is freely available and doesn’t cost money to use their API, which is a <strong>huge</strong> benefit when compared to Google Maps’s very expensive API charges.</p>

<p>I recently got a dog and would like to take him out on long outings without having to carry water. So I wanted to plot a series of waypoints that were drinking fountains with a dog bowl, from which to construct walking/running loops. These dog bowls are not unusual to see in suburban Melbourne. I could not find a website that readily makes this information available, so I surmise that knowledge of their whereabouts is commonly gathered through experience. This is my first dog and I am not patient when I do not need to be, so I did not want to settle for repetitive circuits while I built up a mental model of local watering spots. Openstreetmap seems to be the <a href="https://wiki.openstreetmap.org/wiki/Tag:amenity%3Ddrinking_water">only source of information for this</a> that <a href="https://wiki.openstreetmap.org/wiki/Key:dog">distinguishes if dogs are accommodated or not</a>, and helpfully it exposes all of this information through its API.</p>

<h1 id="api-endpoint-and-access">API Endpoint and Access</h1>
<p>The Overpass API is the read-only interface on a server that receives <a href="https://wiki.openstreetmap.org/wiki/Overpass_API/Overpass_QL">OverpassQL</a> payloads and returns geographic information in different formats such as CSV, JSON, etc.</p>

<p>Usefully, there is <a href="https://overpass-turbo.eu/">Overpass Turbo</a> to help with queries and plotting results, to play around with.</p>

<p>As this is a free service, an API key is not needed, and you can start writing queries in the web user interface to get started.</p>

<h2 id="getting-started-with-overpassql">Getting Started with OverpassQL</h2>
<p>I found the OverpassQL language to be unusual, but it was straightforward to figure out what I needed to do, which was to find points (nodes, in Openstreetmap terminology) matching a certain condition. Later on, I would work up to parks, which form an area (or way, in Openstreetmap) and requires a little bit more effort.</p>

<p>I found that the <a href="https://wiki.openstreetmap.org/wiki/Overpass_API/Overpass_API_by_Example">Overpass API Example</a> is a very useful guide.</p>

<h1 id="queries">Queries</h1>

<h2 id="drinking-water">Drinking Water</h2>
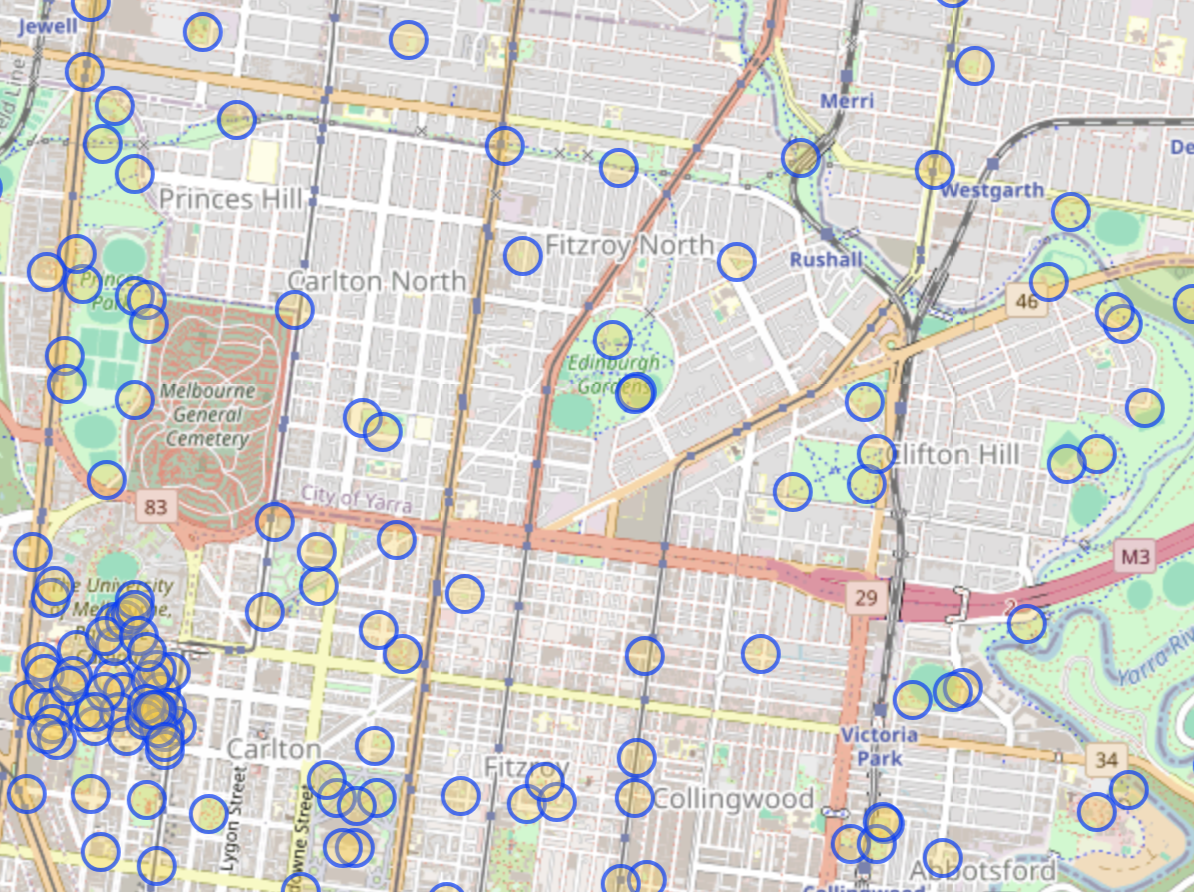
<p>This query will show all drinking water nodes in your viewport on <a href="https://overpass-turbo.eu/">Overpass Turbo</a>.</p>
<div class="language-plaintext highlighter-rouge"><div class="highlight"><pre class="highlight"><code>[bbox:{{bbox}}];
node["amenity"="drinking_water"];
out;
</code></pre></div></div>

<!-- _includes/image.html -->
<div class="image-wrapper">
    
        <img src="https://blog.joelbuckley.com.au/assets/images/2024-osm/drinking_water.png" alt="Drinking water (fountains) in the suburbs." width="600px" />
    
    
        <p class="image-caption">Drinking water query results</p>
    
</div>

<h2 id="drinking-water-with-a-dog-bowl">Drinking Water With a Dog Bowl</h2>
<p>This query will show all drinking water nodes that have the <code class="language-plaintext highlighter-rouge">"dog"="yes"</code> tag, in your viewport on <a href="https://overpass-turbo.eu/">Overpass Turbo</a>.</p>

<div class="language-plaintext highlighter-rouge"><div class="highlight"><pre class="highlight"><code>[bbox:{{bbox}}];
node["amenity"="drinking_water"](if: t["dog"] == "yes");
out;
</code></pre></div></div>

<h2 id="bonus-parks">Bonus: Parks</h2>
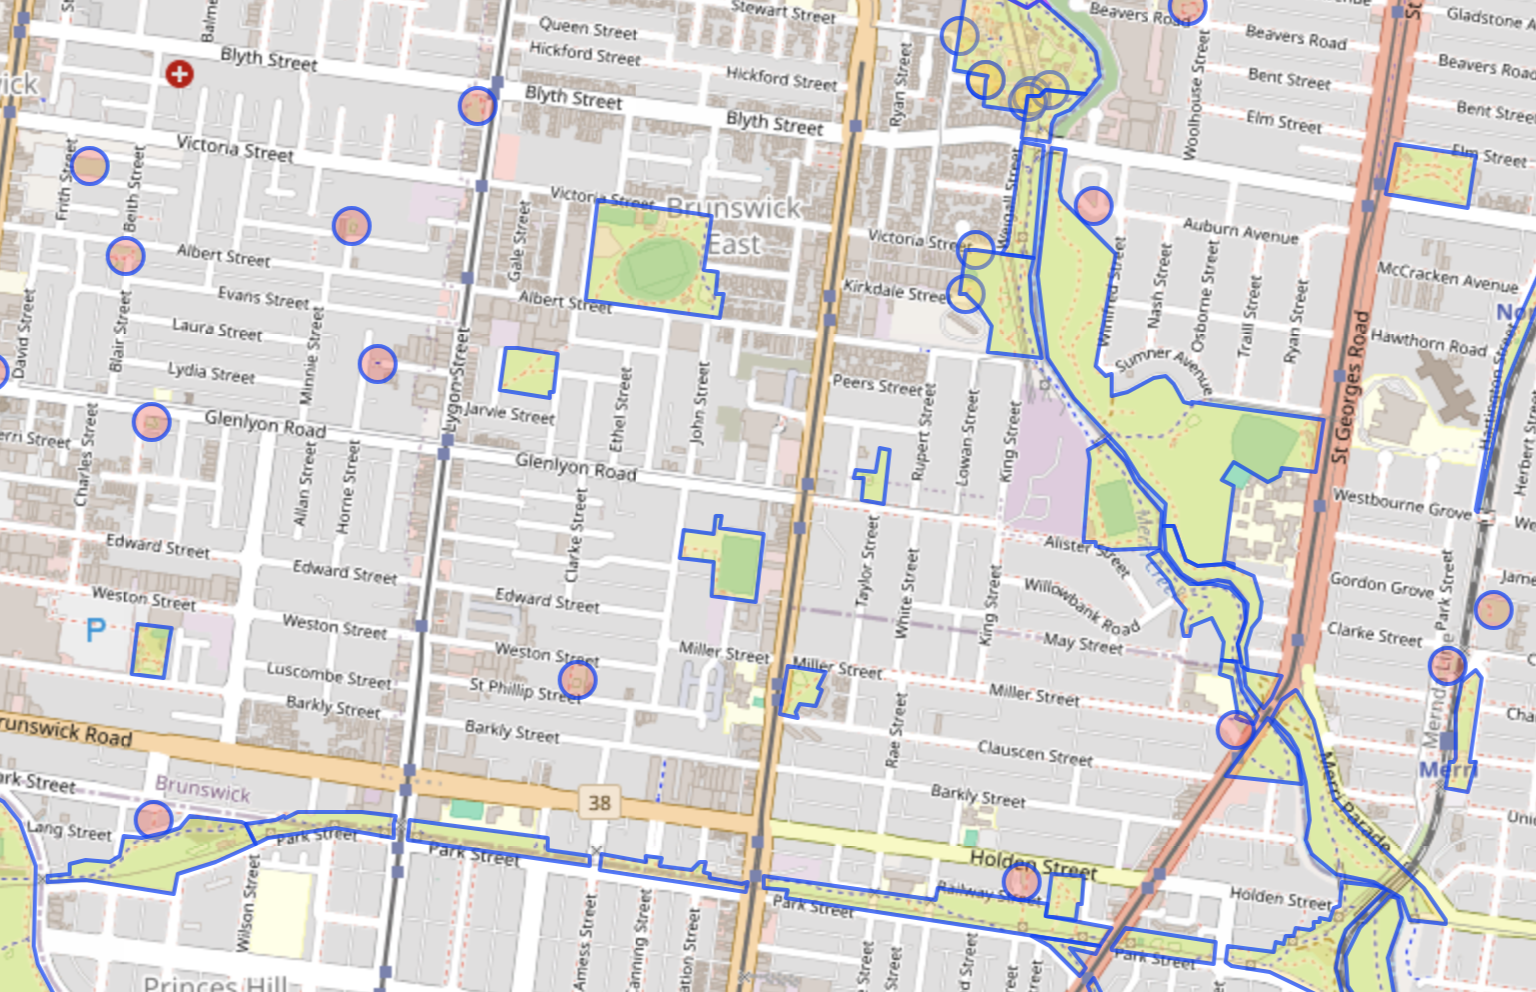
<p>This query will show all parks in your viewport on <a href="https://overpass-turbo.eu/">Overpass Turbo</a>.</p>
<div class="language-plaintext highlighter-rouge"><div class="highlight"><pre class="highlight"><code>[bbox:{{bbox}}];
(
  way["leisure"="park"];
    &gt;;
  );
out;
</code></pre></div></div>

<!-- _includes/image.html -->
<div class="image-wrapper">
    
        <img src="https://blog.joelbuckley.com.au/assets/images/2024-osm/parks.png" alt="Parks in the suburbs." width="600px" />
    
    
        <p class="image-caption">Parks query results</p>
    
</div>

<p>I used this to start scouting out nearby parks that might be missing drinking water information.</p>

<h1 id="referencesfurther-reading">References/Further Reading:</h1>
<ul>
  <li><a href="https://osm-queries.ldodds.com/tutorial/index.html">https://osm-queries.ldodds.com/tutorial/index.html</a></li>
</ul>]]></content><author><name></name></author><category term="Computing" /><category term="Victoria" /><category term="Running" /><category term="geospatial" /><category term="mapping" /><category term="osm" /><summary type="html"><![CDATA[Openstreetmap Openstreetmap is a tremendous resource that has a wealth and quality of information that often surpasses Google Maps, the web’s de-facto mapping solution since 2005. It contains information that is freely available and doesn’t cost money to use their API, which is a huge benefit when compared to Google Maps’s very expensive API charges. I recently got a dog and would like to take him out on long outings without having to carry water. So I wanted to plot a series of waypoints that were drinking fountains with a dog bowl, from which to construct walking/running loops. These dog bowls are not unusual to see in suburban Melbourne. I could not find a website that readily makes this information available, so I surmise that knowledge of their whereabouts is commonly gathered through experience. This is my first dog and I am not patient when I do not need to be, so I did not want to settle for repetitive circuits while I built up a mental model of local watering spots. Openstreetmap seems to be the only source of information for this that distinguishes if dogs are accommodated or not, and helpfully it exposes all of this information through its API. API Endpoint and Access The Overpass API is the read-only interface on a server that receives OverpassQL payloads and returns geographic information in different formats such as CSV, JSON, etc. Usefully, there is Overpass Turbo to help with queries and plotting results, to play around with. As this is a free service, an API key is not needed, and you can start writing queries in the web user interface to get started. Getting Started with OverpassQL I found the OverpassQL language to be unusual, but it was straightforward to figure out what I needed to do, which was to find points (nodes, in Openstreetmap terminology) matching a certain condition. Later on, I would work up to parks, which form an area (or way, in Openstreetmap) and requires a little bit more effort. I found that the Overpass API Example is a very useful guide. Queries Drinking Water This query will show all drinking water nodes in your viewport on Overpass Turbo. [bbox:{{bbox}}]; node["amenity"="drinking_water"]; out; Drinking water query results Drinking Water With a Dog Bowl This query will show all drinking water nodes that have the "dog"="yes" tag, in your viewport on Overpass Turbo. [bbox:{{bbox}}]; node["amenity"="drinking_water"](if: t["dog"] == "yes"); out; Bonus: Parks This query will show all parks in your viewport on Overpass Turbo. [bbox:{{bbox}}]; ( way["leisure"="park"]; &gt;; ); out; Parks query results I used this to start scouting out nearby parks that might be missing drinking water information. References/Further Reading: https://osm-queries.ldodds.com/tutorial/index.html]]></summary></entry><entry><title type="html">10GbE on SFP+ with Proxmox passthrough on a Dell R720</title><link href="https://blog.joelbuckley.com.au/2023/06/10gbe-dell-R720" rel="alternate" type="text/html" title="10GbE on SFP+ with Proxmox passthrough on a Dell R720" /><published>2023-06-24T00:00:00+00:00</published><updated>2023-06-24T00:00:00+00:00</updated><id>https://blog.joelbuckley.com.au/2023/06/10gbe-dell-R720</id><content type="html" xml:base="https://blog.joelbuckley.com.au/2023/06/10gbe-dell-R720"><![CDATA[<h1 id="the-need-for-speed">The Need for Speed</h1>

<p>Recently I have been upgrading my homelab, complete with enterprise hardware and robust storage solutions. This solution is eventually intended to replace my ageing Synology RS3618xs as my primary system for applications and storage.</p>

<p>I wanted to ensure that after the build, fast storage devices would not be constrained by the speed of a 1Gb/s network. I decided to go to 10Gb/s where possible, which would take maximum hard drive speeds across the network from ~125MB/s to 1.25GB/s.</p>

<h2 id="options">Options</h2>

<p>The routers and switches I have only have SFP (not SFP+) ports, which mean a maximum of 1Gb/s. This meant I would need a new switch with SFP+ ports.</p>

<p>I have generally centralised my networking equipment on the Ubiquiti EdgeRouter/EdgeSwitch lines, so the logical product for me to acquire was the <a href="https://store.ui.com/us/en/products/es-16-xg">EdgeSwitch 16-XG</a>. Unfortunately Ubiquiti EdgeSwitches have been exceedingly difficult to get since 2020, but luckily a model popped up on eBay and I was able to win the auction.</p>

<h2 id="sfp-transceivers-and-physical-media">SFP+ Transceivers and Physical Media</h2>
<!-- _includes/image.html -->
<div class="image-wrapper">
    
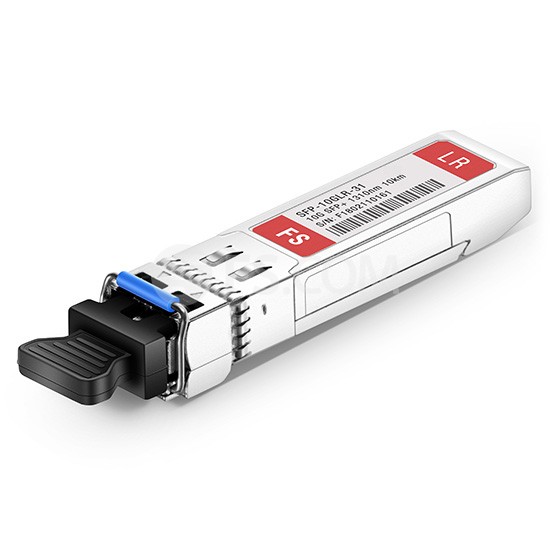
        <img src="https://blog.joelbuckley.com.au/assets/images/2023-10gbe/fs-ubiquiti-transceiver.jpg" alt="FS.com transceiver." width="400px" />
    
    
        <p class="image-caption">FS.com SFP+ transceiver. <em>Image: FS.com</em>.</p>
    
</div>

<p>Small Form-factor Pluggable (SFP+) network interfaces can be either copper (RJ45S) with a high grade cable such as category 6a, 7, 8 — or you can get fibre. I was only interested in fibre, because it was new for me and I wanted to learn about how to use it with hands-on experience.</p>

<h2 id="fibre">Fibre</h2>
<!-- _includes/image.html -->
<div class="image-wrapper">
    
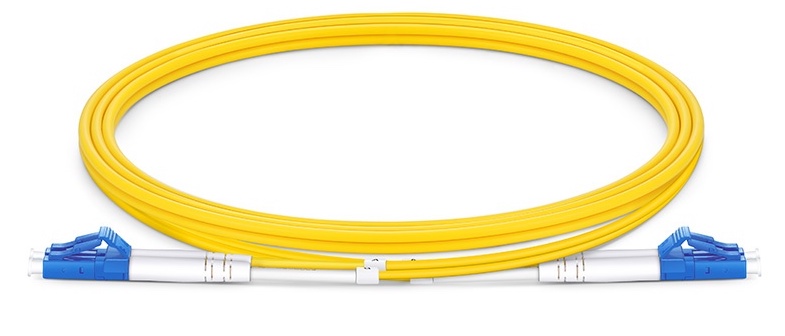
        <img src="https://blog.joelbuckley.com.au/assets/images/2023-10gbe/fibre-patch.jpg" alt="FS.com fibre patch cable." width="400px" />
    
    
        <p class="image-caption">FS.com fibre patch cable. <em>Image: FS.com</em>.</p>
    
</div>

<p>Fibre optic cables come in 2 main categories: single-mode or multi-mode. The “mode” refers to the number of beams of light going down the fibre at the same time. Single mode is generally a harder technology to manufacture and make related parts for, and is generally more expensive than an equivalent multi-mode cable, but supports further distances and higher speeds. The benefits of single mode were not really applicable for me in this build, but I decided to get it anyway in case I decided to start running cables through my house’s walls, in which case I would want a future-proof technology.</p>

<p>The exact products I bought were:</p>
<ol>
  <li><a href="https://www.fs.com/au/products/40192.html">FS.com LC UPC to LC UPC OS2 patch cable</a></li>
  <li><a href="https://www.fs.com/au/products/15487.html">Dell-compatible 1310nm transceivers</a></li>
  <li><a href="https://www.fs.com/au/products/65337.html">Ubiquiti-compatiable 1310nm transceivers</a></li>
</ol>

<p>I also acquired some SFP (not SFP+) transceivers to provide fibre connectivity between some switches that only had 1Gb/s SFP ports.</p>

<h2 id="sfp-pcie-card">SFP+ PCIE card</h2>
<p>With 2 Dell R720s available, the missing piece was an SFP+ port to plug into my servers. I bought an Intel X520-DA2 PCIE card for each of my servers, theoretically giving me end-to-end connectivity at 10Gb/s for each of my enterprise servers.</p>

<h2 id="making-the-sfp-module-work">Making the SFP+ module work</h2>
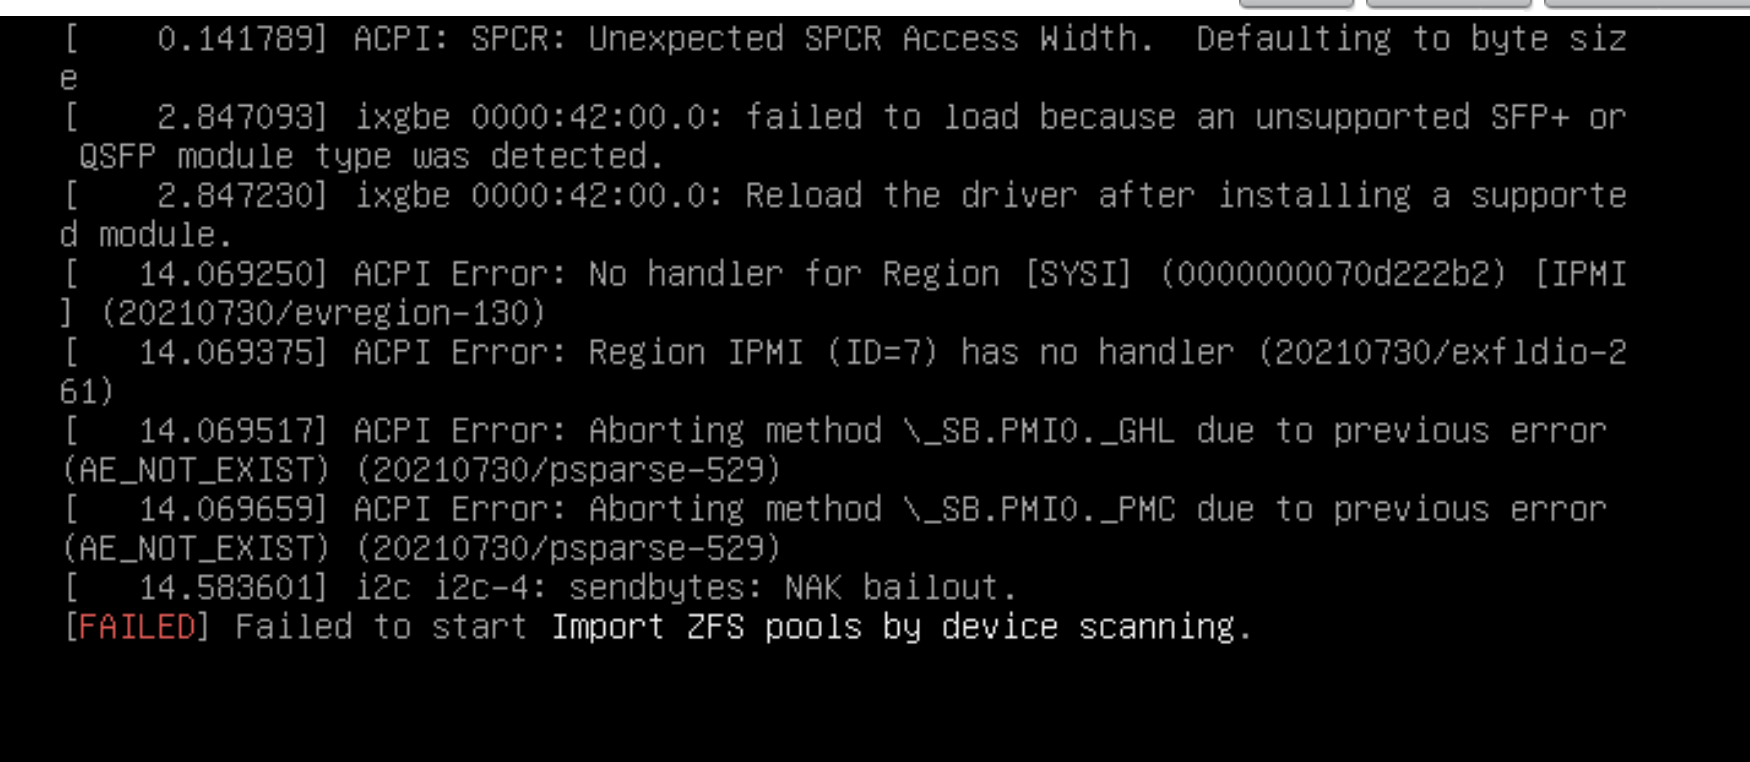
<p>The PCIE card was recognised on a reboot (or two) of the Dell machines, but near the end of the boot sequence it would complain that <strong>ixgbe failed to initialize because an unsupported sfp+ module type was detected</strong>, and would show <code class="language-plaintext highlighter-rouge">NO-CARRIER</code> when listing ip interfaces on the command line.</p>

<!-- _includes/image.html -->
<div class="image-wrapper">
    
        <img src="https://blog.joelbuckley.com.au/assets/images/2023-10gbe/unsupported_module_error.png" alt="Error message on boot: ixgbe failed to initialize because an unsupported sfp+ module type was detected." />
    
    
        <p class="image-caption">Error message shown from iDRAC console.</p>
    
</div>

<p>This is not an uncommon issue when trying to get SFP+ working on Dell machines, but I was surprised to come across it when everything I had bought had been advertised as compatible with Dells.</p>

<p>From <a href="https://www.serveradminz.com/blog/unsupported-sfp-linux/">https://www.serveradminz.com/blog/unsupported-sfp-linux/</a>, the first steps to remedy this problem are:</p>

<ol>
  <li><code class="language-plaintext highlighter-rouge">[root@xyz ~]# vi /etc/default/grub</code></li>
  <li>In the text file, edit <code class="language-plaintext highlighter-rouge">GRUB_CMDLINE_LINUX="ixgbe.allow_unsupported_sfp=1"</code> (Adding the parameter to the line GRUB_CMDLINE_LINUX=”” )</li>
  <li><code class="language-plaintext highlighter-rouge">[root@xyz ~]# grub-mkconfig -o /boot/grub/grub.cfg</code> (Upgrading the grub with the command)</li>
  <li><code class="language-plaintext highlighter-rouge">[root@xyz ~]# rmmod ixgbe &amp;&amp; modprobe ixgbe</code></li>
  <li><code class="language-plaintext highlighter-rouge">reboot</code></li>
</ol>

<p>After this the PCIE card did not log errors about compatability on boot. If you see no errors (usually very close to the end of the boot process) then you should be good to move on to the next step.</p>

<h2 id="setting-up-the-network">Setting up the network</h2>

<p>I needed to tell the host OS, Proxmox in my case, about the new interfaces available to it. As I wanted <strong>all</strong> traffic to pass through the fibre, I decided to deactive the ethernet interface at the same time.</p>

<p>The critical file to (carefully) edit was <code class="language-plaintext highlighter-rouge">/etc/networks/interfaces</code>.</p>

<p>Before editing, it looks something like this:</p>
<div class="language-plaintext highlighter-rouge"><div class="highlight"><pre class="highlight"><code># network interface settings; autogenerated
# Please do NOT modify this file directly, unless you know what
# you're doing.
#
# If you want to manage parts of the network configuration manually,
# please utilize the 'source' or 'source-directory' directives to do
# so.
# PVE will preserve these directives, but will NOT read its network
# configuration from sourced files, so do not attempt to move any of
# the PVE managed interfaces into external files!

auto lo
iface lo inet loopback

iface eno1 inet manual

iface eno2 inet manual

iface eno3 inet manual

iface eno4 inet manual

iface enp66s0f0 inet manual

iface enp66s0f1 inet manual

auto vmbr0
iface vmbr0 inet static
	bridge-ports eno1
	bridge-stp off
	bridge-fd 0
	bridge-vlan-aware yes
	bridge-vids 2-4094

auto vmbr0.9
iface vmbr0.9 inet static
	address 192.168.35.16/24
	gateway 192.168.35.1

</code></pre></div></div>

<p>After my edits, I looked like this:</p>
<div class="language-plaintext highlighter-rouge"><div class="highlight"><pre class="highlight"><code># network interface settings; autogenerated
# Please do NOT modify this file directly, unless you know what
# you're doing.
#
# If you want to manage parts of the network configuration manually,
# please utilize the 'source' or 'source-directory' directives to do
# so.
# PVE will preserve these directives, but will NOT read its network
# configuration from sourced files, so do not attempt to move any of
# the PVE managed interfaces into external files!

auto lo
iface lo inet loopback

iface eno1 inet manual

iface eno2 inet manual

iface eno3 inet manual

iface eno4 inet manual

iface enp66s0f0 inet manual

iface enp66s0f1 inet manual

#auto vmbr0
#iface vmbr0 inet static
#	bridge-ports eno1
#	bridge-stp off
#	bridge-fd 0
#	bridge-vlan-aware yes
#	bridge-vids 2-4094
#
#auto vmbr0.9
#iface vmbr0.9 inet static
#	address 192.168.35.116/24
#	gateway 192.168.35.1

# NOTE: I have changed the IP address above before commenting it out

auto vmbr1
iface vmbr1 inet static
	bridge-ports enp66s0f0
	bridge-stp off
	bridge-fd 0
	bridge-vlan-aware yes
	bridge-vids 2-4094
	pre-up ip link set vmbr1 mtu 9000

auto vmbr1.9
iface vmbr1.9 inet static
	address 192.168.35.16/24
	gateway 192.168.35.1
</code></pre></div></div>

<p>You will see that I copied the structure of the <code class="language-plaintext highlighter-rouge">vmbr0</code> bridge into a new bridge called <code class="language-plaintext highlighter-rouge">vmbr1</code> for the fibre connection, and commented out <code class="language-plaintext highlighter-rouge">vmbr0</code>. A quick <code class="language-plaintext highlighter-rouge">systemctl restart networking</code> to restart networking (usually takes less than 30 seconds, occasionally a little longer) and your interface should be up.</p>

<p>You can check with <code class="language-plaintext highlighter-rouge">ip a</code> and <code class="language-plaintext highlighter-rouge">ip addr list</code>. The fibre connections were named something like <code class="language-plaintext highlighter-rouge">enp66s0f0</code>.</p>

<h2 id="jumbo-frames">Jumbo Frames</h2>
<p>A frame is the unit of data sent by the ethernet protocol. The size of the frame can be extended, which can help to improve speeds at high bandwiths such as 10Gb/s. For this setting to work, it needs to be set to 9000 all the way through the “stack”.</p>

<p>In my case, for each machine, this meant setting the MTU 3 times:</p>
<pre><code class="language-/bin/bash"># ip link set fwbr100i0 mtu 9000
# ip link set vmbr1 mtu 9000
# ip link set vmbr1.9 mtu 9000
</code></pre>

<p>To test the MTU setting, you can modify <code class="language-plaintext highlighter-rouge">ping</code> arguments to send a jumbo-frame ping: <code class="language-plaintext highlighter-rouge">ping -M do -s 8972</code>.</p>

<p>References:<br />
<a href="https://blah.cloud/networks/test-jumbo-frames-working/">https://blah.cloud/networks/test-jumbo-frames-working/</a><br />
<a href="https://linuxconfig.org/how-to-enable-jumbo-frames-in-linux">https://linuxconfig.org/how-to-enable-jumbo-frames-in-linux</a></p>

<h2 id="vm-changes">VM Changes</h2>
<p>If you are using Proxmox, you will need to set each VM’s network to <code class="language-plaintext highlighter-rouge">vmbr1</code> from <code class="language-plaintext highlighter-rouge">vmbr0</code>. It will not start if its network bridge no longer exists.</p>

<h2 id="speed-test-results">Speed test results</h2>
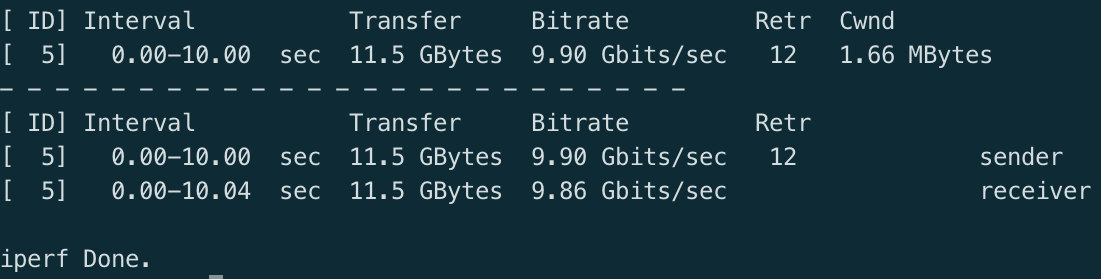
<p>Testing from machine to machine (bare metal), I was able to achieve the maximum expected line rate.
<!-- _includes/image.html --></p>
<div class="image-wrapper">
    
        <img src="https://blog.joelbuckley.com.au/assets/images/2023-10gbe/speedtest.png" alt="Speedtest results showing 9.9 Gb/s" />
    
    
        <p class="image-caption">Testing across the SFP+ switches showing 9.9 Gb/s.</p>
    
</div>

<p>Testing across virtual machines unfortunately yielded slower results, around 7.5 Gb/s. I am working to understand and resolve this next.</p>]]></content><author><name></name></author><category term="Computing" /><category term="Homelab" /><category term="10gbe" /><category term="SFP+" /><summary type="html"><![CDATA[The Need for Speed Recently I have been upgrading my homelab, complete with enterprise hardware and robust storage solutions. This solution is eventually intended to replace my ageing Synology RS3618xs as my primary system for applications and storage. I wanted to ensure that after the build, fast storage devices would not be constrained by the speed of a 1Gb/s network. I decided to go to 10Gb/s where possible, which would take maximum hard drive speeds across the network from ~125MB/s to 1.25GB/s. Options The routers and switches I have only have SFP (not SFP+) ports, which mean a maximum of 1Gb/s. This meant I would need a new switch with SFP+ ports. I have generally centralised my networking equipment on the Ubiquiti EdgeRouter/EdgeSwitch lines, so the logical product for me to acquire was the EdgeSwitch 16-XG. Unfortunately Ubiquiti EdgeSwitches have been exceedingly difficult to get since 2020, but luckily a model popped up on eBay and I was able to win the auction. SFP+ Transceivers and Physical Media FS.com SFP+ transceiver. Image: FS.com. Small Form-factor Pluggable (SFP+) network interfaces can be either copper (RJ45S) with a high grade cable such as category 6a, 7, 8 — or you can get fibre. I was only interested in fibre, because it was new for me and I wanted to learn about how to use it with hands-on experience. Fibre FS.com fibre patch cable. Image: FS.com. Fibre optic cables come in 2 main categories: single-mode or multi-mode. The “mode” refers to the number of beams of light going down the fibre at the same time. Single mode is generally a harder technology to manufacture and make related parts for, and is generally more expensive than an equivalent multi-mode cable, but supports further distances and higher speeds. The benefits of single mode were not really applicable for me in this build, but I decided to get it anyway in case I decided to start running cables through my house’s walls, in which case I would want a future-proof technology. The exact products I bought were: FS.com LC UPC to LC UPC OS2 patch cable Dell-compatible 1310nm transceivers Ubiquiti-compatiable 1310nm transceivers I also acquired some SFP (not SFP+) transceivers to provide fibre connectivity between some switches that only had 1Gb/s SFP ports. SFP+ PCIE card With 2 Dell R720s available, the missing piece was an SFP+ port to plug into my servers. I bought an Intel X520-DA2 PCIE card for each of my servers, theoretically giving me end-to-end connectivity at 10Gb/s for each of my enterprise servers. Making the SFP+ module work The PCIE card was recognised on a reboot (or two) of the Dell machines, but near the end of the boot sequence it would complain that ixgbe failed to initialize because an unsupported sfp+ module type was detected, and would show NO-CARRIER when listing ip interfaces on the command line. Error message shown from iDRAC console. This is not an uncommon issue when trying to get SFP+ working on Dell machines, but I was surprised to come across it when everything I had bought had been advertised as compatible with Dells. From https://www.serveradminz.com/blog/unsupported-sfp-linux/, the first steps to remedy this problem are: [root@xyz ~]# vi /etc/default/grub In the text file, edit GRUB_CMDLINE_LINUX="ixgbe.allow_unsupported_sfp=1" (Adding the parameter to the line GRUB_CMDLINE_LINUX=”” ) [root@xyz ~]# grub-mkconfig -o /boot/grub/grub.cfg (Upgrading the grub with the command) [root@xyz ~]# rmmod ixgbe &amp;&amp; modprobe ixgbe reboot After this the PCIE card did not log errors about compatability on boot. If you see no errors (usually very close to the end of the boot process) then you should be good to move on to the next step. Setting up the network I needed to tell the host OS, Proxmox in my case, about the new interfaces available to it. As I wanted all traffic to pass through the fibre, I decided to deactive the ethernet interface at the same time. The critical file to (carefully) edit was /etc/networks/interfaces. Before editing, it looks something like this: # network interface settings; autogenerated # Please do NOT modify this file directly, unless you know what # you're doing. # # If you want to manage parts of the network configuration manually, # please utilize the 'source' or 'source-directory' directives to do # so. # PVE will preserve these directives, but will NOT read its network # configuration from sourced files, so do not attempt to move any of # the PVE managed interfaces into external files! auto lo iface lo inet loopback iface eno1 inet manual iface eno2 inet manual iface eno3 inet manual iface eno4 inet manual iface enp66s0f0 inet manual iface enp66s0f1 inet manual auto vmbr0 iface vmbr0 inet static bridge-ports eno1 bridge-stp off bridge-fd 0 bridge-vlan-aware yes bridge-vids 2-4094 auto vmbr0.9 iface vmbr0.9 inet static address 192.168.35.16/24 gateway 192.168.35.1 After my edits, I looked like this: # network interface settings; autogenerated # Please do NOT modify this file directly, unless you know what # you're doing. # # If you want to manage parts of the network configuration manually, # please utilize the 'source' or 'source-directory' directives to do # so. # PVE will preserve these directives, but will NOT read its network # configuration from sourced files, so do not attempt to move any of # the PVE managed interfaces into external files! auto lo iface lo inet loopback iface eno1 inet manual iface eno2 inet manual iface eno3 inet manual iface eno4 inet manual iface enp66s0f0 inet manual iface enp66s0f1 inet manual #auto vmbr0 #iface vmbr0 inet static # bridge-ports eno1 # bridge-stp off # bridge-fd 0 # bridge-vlan-aware yes # bridge-vids 2-4094 # #auto vmbr0.9 #iface vmbr0.9 inet static # address 192.168.35.116/24 # gateway 192.168.35.1 # NOTE: I have changed the IP address above before commenting it out auto vmbr1 iface vmbr1 inet static bridge-ports enp66s0f0 bridge-stp off bridge-fd 0 bridge-vlan-aware yes bridge-vids 2-4094 pre-up ip link set vmbr1 mtu 9000 auto vmbr1.9 iface vmbr1.9 inet static address 192.168.35.16/24 gateway 192.168.35.1 You will see that I copied the structure of the vmbr0 bridge into a new bridge called vmbr1 for the fibre connection, and commented out vmbr0. A quick systemctl restart networking to restart networking (usually takes less than 30 seconds, occasionally a little longer) and your interface should be up. You can check with ip a and ip addr list. The fibre connections were named something like enp66s0f0. Jumbo Frames A frame is the unit of data sent by the ethernet protocol. The size of the frame can be extended, which can help to improve speeds at high bandwiths such as 10Gb/s. For this setting to work, it needs to be set to 9000 all the way through the “stack”. In my case, for each machine, this meant setting the MTU 3 times: # ip link set fwbr100i0 mtu 9000 # ip link set vmbr1 mtu 9000 # ip link set vmbr1.9 mtu 9000 To test the MTU setting, you can modify ping arguments to send a jumbo-frame ping: ping -M do -s 8972. References: https://blah.cloud/networks/test-jumbo-frames-working/ https://linuxconfig.org/how-to-enable-jumbo-frames-in-linux VM Changes If you are using Proxmox, you will need to set each VM’s network to vmbr1 from vmbr0. It will not start if its network bridge no longer exists. Speed test results Testing from machine to machine (bare metal), I was able to achieve the maximum expected line rate. Testing across the SFP+ switches showing 9.9 Gb/s. Testing across virtual machines unfortunately yielded slower results, around 7.5 Gb/s. I am working to understand and resolve this next.]]></summary><media:thumbnail xmlns:media="http://search.yahoo.com/mrss/" url="https://blog.joelbuckley.com.au/assets/images/2023-10gbe/fs-ubiquiti-transceiver.jpg" /><media:content medium="image" url="https://blog.joelbuckley.com.au/assets/images/2023-10gbe/fs-ubiquiti-transceiver.jpg" xmlns:media="http://search.yahoo.com/mrss/" /></entry><entry><title type="html">My Bike and Multi-camera Post-ride Processing Workflow</title><link href="https://blog.joelbuckley.com.au/2023/01/bike-camera-workflow" rel="alternate" type="text/html" title="My Bike and Multi-camera Post-ride Processing Workflow" /><published>2023-01-31T00:00:00+00:00</published><updated>2023-01-31T00:00:00+00:00</updated><id>https://blog.joelbuckley.com.au/2023/01/bike-camera-workflow</id><content type="html" xml:base="https://blog.joelbuckley.com.au/2023/01/bike-camera-workflow"><![CDATA[<p><strong>Update:</strong> I have now <a href="https://gist.github.com/jeauxlb/6f72d8eb5d6aaf9fabb189ad701aa49c">published a GitHub gist</a> that automates the video processing described below, and can run against my video files immiediately after each ride to create a single, time-synchronised video output.</p>

<hr style="width: 70%; margin: auto; margin-top: 20px; margin-bottom: 20px;" />

<p>Recently I decided to get some video cameras for my bike. These cameras, filming both the front and rear of my bike, capture footage in 5 minute long files.</p>

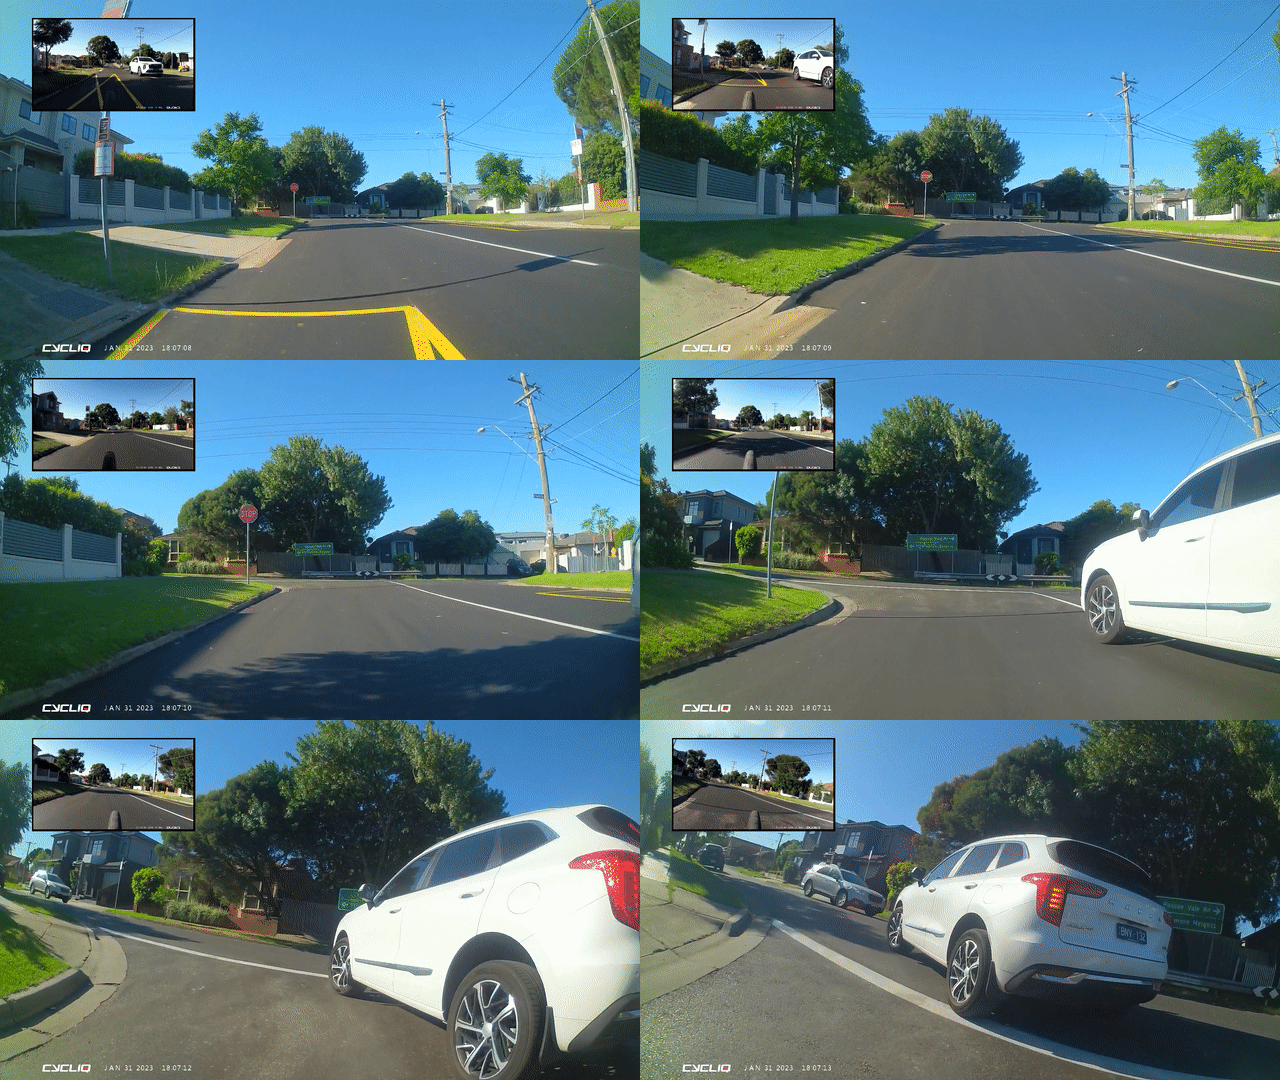
<p>Though there is an app that comes with my cameras, and they are both made by the same manufacturer, there is no way to easily combine a long ride into a single video for easy (or uneasy) viewing. I set about creating a workflow to make a complete video of my rides. My desired end goal looks something like this (the image layout, not the impending sense of doom):</p>

<!-- _includes/image.html -->
<div class="image-wrapper">
    
    <a href="/assets/images/2023-bike-camera-workflow/endgoal.gif" title="Point of view image of a cyclist being side-swiped with a rear-view inset image." target="_blank">
    
        <img src="https://blog.joelbuckley.com.au/assets/images/2023-bike-camera-workflow/endgoal.jpg" alt="Point of view image of a cyclist being side-swiped with a rear-view inset image." />
    
    </a>
    
    
        <p class="image-caption">Another beautiful day by the beach.</p>
    
</div>

<!--more-->

<h2 id="tools-and-requirements">Tools and Requirements</h2>
<p><code class="language-plaintext highlighter-rouge">ffmpeg</code> is the go-to for many command-line approaches to processing a variety of moving images, and this use-case is not particularly special. However I had not used <code class="language-plaintext highlighter-rouge">ffmpeg</code> before, let along constructed a semi-complicated workflow. I began first with almost no knowledge of <code class="language-plaintext highlighter-rouge">ffmpeg</code>, so didn’t know what requirements would be reasonable.</p>

<p>After a little testing and playing around, I developed the following list:</p>
<ol>
  <li>Picture in picture; larger view of the main camera, with and inset view of the rear camera.</li>
  <li>The inset image should have a frame, to subtly visually separate the two images.</li>
  <li>The images had to be exactly aligned in time (more on this later).</li>
  <li>The inset image should look similar to an Australian ‘rear view mirror’ perspective. I tried other approaches but they made less visual sense to me than looking up and to the left to see a horizontally flipped image of the rear view.</li>
  <li>Make the dull images from my bike cameras ‘pop’ a bit more.</li>
</ol>

<h3 id="file-combination">File Combination</h3>
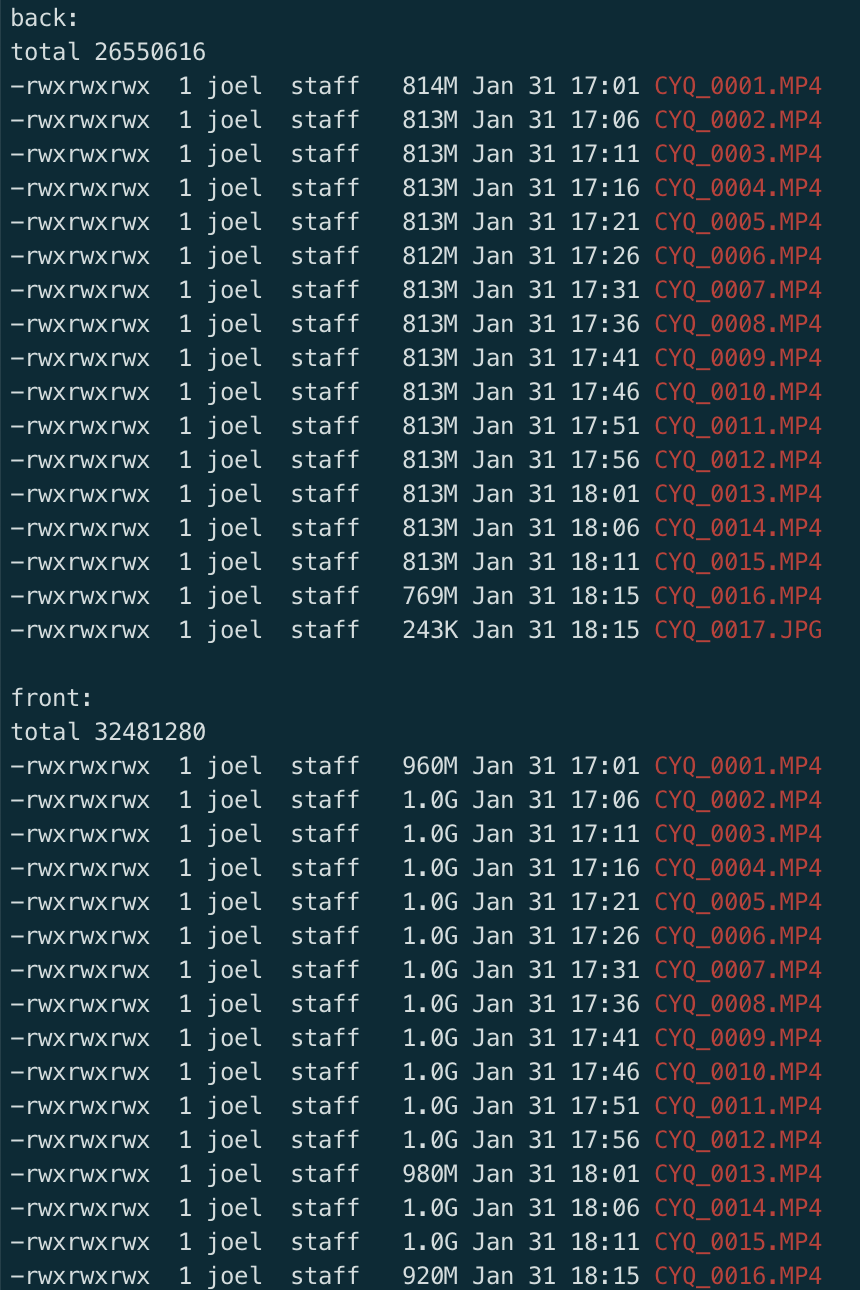
<p>The files from the microSD cards come across as chunks of MP4 files of 5 minute duration.</p>

<!-- _includes/image.html -->
<div class="image-wrapper">
    
        <img src="https://blog.joelbuckley.com.au/assets/images/2023-bike-camera-workflow/files.png" alt="Sample listing of files created by front and rear cameras." width="520px" />
    
    
        <p class="image-caption">File listing.</p>
    
</div>

<p>There are a few ways to do this, but the quickest result from a web search was what I ended up using. This is not that interesting:</p>
<div class="language-bash highlighter-rouge"><div class="highlight"><pre class="highlight"><code><span class="c"># front</span>
<span class="nb">ls </span>front/<span class="k">*</span>.MP4 | <span class="nb">awk</span> <span class="s1">'{print "file " "'</span><span class="se">\'</span><span class="s1">'" $0 "'</span><span class="se">\'</span><span class="s1">'"}'</span> | <span class="nb">tee </span>front-files.txt
ffmpeg <span class="nt">-f</span> concat <span class="nt">-i</span> front-files.txt <span class="nt">-c</span> copy <span class="nt">-flags</span> +global_header <span class="nt">-c</span>:a aac output/front.mp4
<span class="nb">rm </span>front-files.txt

<span class="c"># back</span>
<span class="nb">ls </span>back/<span class="k">*</span>.MP4 | <span class="nb">awk</span> <span class="s1">'{print "file " "'</span><span class="se">\'</span><span class="s1">'" $0 "'</span><span class="se">\'</span><span class="s1">'"}'</span> | <span class="nb">tee </span>back-files.txt
ffmpeg <span class="nt">-f</span> concat <span class="nt">-i</span> back-files.txt <span class="nt">-c</span> copy <span class="nt">-flags</span> +global_header <span class="nt">-c</span>:a aac output/back.mp4
<span class="nb">rm </span>back-files.txt
</code></pre></div></div>

<h3 id="complex-filter">Complex filter</h3>
<p>I had not come across the <code class="language-plaintext highlighter-rouge">filter_complex</code> argument in <code class="language-plaintext highlighter-rouge">ffmpeg</code> before, but it’s neat and easy to use. The <code class="language-plaintext highlighter-rouge">-i</code> (input) arguments you give to <code class="language-plaintext highlighter-rouge">ffmpeg</code> correspond respectively to <code class="language-plaintext highlighter-rouge">[0]</code>, <code class="language-plaintext highlighter-rouge">[1]</code>, and so on. You can then process, mix and mash, like this:</p>
<div class="language-bash highlighter-rouge"><div class="highlight"><pre class="highlight"><code>ffmpeg <span class="nt">-i</span> A.mp4 <span class="nt">-i</span> B.mp4 <span class="se">\</span>
<span class="nt">-filter_complex</span> <span class="s2">"[1]scale=iw/4:ih/4 [m]; [m]hflip[pre]; </span><span class="se">\</span><span class="s2">
[pre]pad=w=10+iw:h=10+ih:x=512:y=512:color=black[pip]; </span><span class="se">\</span><span class="s2">
[0][pip] overlay=main_w/20:main_h/20"</span> <span class="se">\</span>
<span class="nt">-vcodec</span> h264 <span class="nt">-c</span>:a aac pip.mp4
</code></pre></div></div>

<p>The user is able to use all of the various filter options in <code class="language-plaintext highlighter-rouge">ffmpeg</code>, and chain them together to create what can be a complex manipulation process.</p>

<h3 id="synchronisation">Synchronisation</h3>
<p>The cameras both start recording as soon as they are switched on. I often switch them on around the same time, but they have differing and variable start-up times, so the footage is all but guaranteed to be out of sync. When you’re trying to present a realistic ‘rear view’ mirror experience, even one tenth of a second in error can be obvious to the viewer in some circumstances. I was able to hand-tune a few videos, but this was a laborious process requiring me to change, validate, and re-encode each time I wanted to fine-tune the delay. I wanted a robust algorithmic solution.</p>

<p>I had some vague ideas of writing an auto-correlation function to line up the audio, but thankfully people who know signal processing better than me over at the <a href="https://www.bbc.co.uk/">BBC</a> have written a tool called <a href="https://github.com/bbc/audio-offset-finder">audio-offset-finder</a> that fits the use-case perfectly.</p>

<p>After a few trials and low certainty results, I found that clapping a few times at the start of the recording, and running the tool over only these first few moments, seems to work to sufficiently align the two video files.</p>

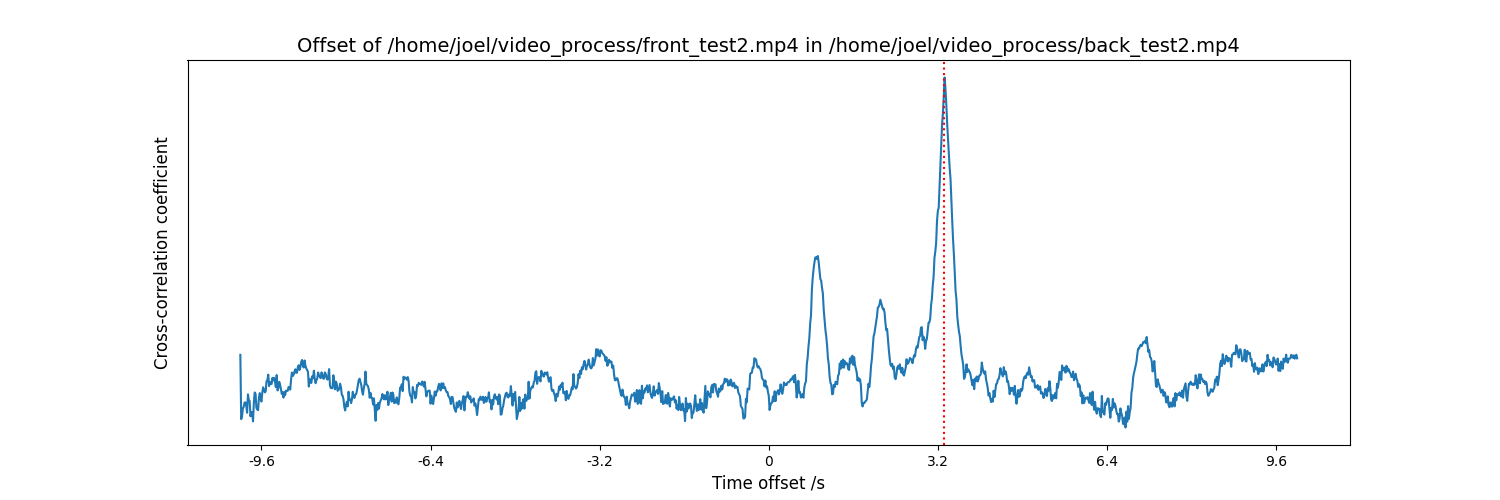
<p>By running the following command, the tool will even create a chart of possible delays and its most confident match.</p>
<div class="language-bash highlighter-rouge"><div class="highlight"><pre class="highlight"><code>~/audio-offset-finder/bin/audio-offset-finder <span class="se">\</span>
<span class="nt">--find-offset-of</span> ~/video_process/front_test.mp4 <span class="se">\</span>
<span class="nt">--within</span> ~/video_process/back_test.mp4 <span class="se">\</span>
<span class="nt">--save-plot</span> ~/video_process/offset.png
</code></pre></div></div>

<!-- _includes/image.html -->
<div class="image-wrapper">
    
    <a href="/assets/images/2023-bike-camera-workflow/offset.png" title="" target="_blank">
    
        <img src="https://blog.joelbuckley.com.au/assets/images/2023-bike-camera-workflow/offset.png" alt="" />
    
    </a>
    
    
        <p class="image-caption">A delay of 3.312 seconds</p>
    
</div>

<p>I then run a command to create a <code class="language-plaintext highlighter-rouge">back2.mp4</code> from <code class="language-plaintext highlighter-rouge">back.mp4</code> which is a slightly cut version, to be merged with <code class="language-plaintext highlighter-rouge">front.mp4</code></p>

<h3 id="pts-startpts">PTS-STARTPTS</h3>
<p>Sometimes the inset picture will not start for a few frames. After some reading about <a href="https://stackoverflow.com/questions/43333542/what-is-video-timescale-timebase-or-timestamp-in-ffmpeg/43337235#43337235">Presentation Time Stamps (PTS)</a> I found that the rear video had a non-zero starting point, which was somehow giving it a delay of ~18 frames. By inserting the <code class="language-plaintext highlighter-rouge">setpts=PTS-STARTPTS</code> line across both video inputs, I was able to have picture-in-picture results from the first frame.</p>

<h2 id="final-product">Final Product</h2>

<p>The command to bring together the combined and then time-aligned files is the following:</p>
<div class="language-bash highlighter-rouge"><div class="highlight"><pre class="highlight"><code>ffmpeg <span class="nt">-i</span> output/front.mp4 <span class="nt">-i</span> output/back2.mp4 <span class="se">\</span>
<span class="nt">-filter_complex</span> <span class="s2">"[0]setpts=PTS-STARTPTS,eq=saturation=1.3:gamma=1.05[main]; </span><span class="se">\</span><span class="s2">
[1]setpts=PTS-STARTPTS,scale=iw/4:ih/4 [m]; [m]hflip[pre]; </span><span class="se">\</span><span class="s2">
[pre]pad=w=10+iw:h=10+ih:x=512:y=512:color=black[pip]; </span><span class="se">\</span><span class="s2">
[main][pip] overlay=main_w/20:main_h/20"</span> <span class="se">\</span>
<span class="nt">-vcodec</span> h264 <span class="nt">-c</span>:a aac pip.mp4
</code></pre></div></div>

<p>And then you can make fun gifs of people doing things like this:</p>

<!-- _includes/image.html -->
<div class="image-wrapper">
    
    <a href="/assets/images/2023-bike-camera-workflow/output.gif" title="Point of view image of a cyclist again almost being side-swiped, with a rear-view inset image." target="_blank">
    
        <img src="https://blog.joelbuckley.com.au/assets/images/2023-bike-camera-workflow/output.gif" alt="Point of view image of a cyclist again almost being side-swiped, with a rear-view inset image." />
    
    </a>
    
    
        <p class="image-caption">Please do not do this.</p>
    
</div>

<h2 id="bonus-features">Bonus Features</h2>
<h3 id="watermark">Watermark</h3>
<p>If you wanted to turn your footage into a branded experience, you might run something like</p>
<div class="language-bash highlighter-rouge"><div class="highlight"><pre class="highlight"><code>ffmpeg <span class="nt">-i</span> output/front_test.mp4 <span class="nt">-i</span> output/back_test.mp4 <span class="se">\</span>
<span class="nt">-i</span> watermark.png <span class="se">\</span>
<span class="nt">-filter_complex</span> <span class="s2">"[0]setpts=PTS-STARTPTS,eq=saturation=1.3:gamma=1.05[main];
[1]setpts=PTS-STARTPTS,scale=iw/4:ih/4 [m];
[m]hflip[pre]; [pre]pad=w=10+iw:h=10+ih:x=512:y=512:color=black[pip];
[main][pip] overlay=main_w/20:main_h/20[vid];
[2]scale=128:-1 [ovrl];
[vid][ovrl] overlay=main_w-overlay_w-100:main_h-overlay_h-50"</span> <span class="nt">-vcodec</span> h264 <span class="nt">-c</span>:a aac pip_watermark.mp4
</code></pre></div></div>

<h3 id="sharpening">Sharpening</h3>
<p>I tried the following command, but didn’t much like the results, and didn’t find that it improved licence plate readability, which was my main reason for investigating it.</p>
<div class="language-bash highlighter-rouge"><div class="highlight"><pre class="highlight"><code>ffmpeg <span class="nt">-i</span> output/front.mp4 <span class="nt">-i</span> output/back2.mp4 <span class="se">\</span>
<span class="nt">-filter_complex</span> <span class="s2">"[0]eq=saturation=1.3:gamma=1.05[main-presharpen]; </span><span class="se">\</span><span class="s2">
[main-presharpen]unsharp=3:3:1.5[main]; [1]unsharp=3:3:1.5[pip-sharpened]; </span><span class="se">\</span><span class="s2">
[pip-sharpened]scale=iw/4:ih/4 [m]; [m]hflip[pre]; </span><span class="se">\</span><span class="s2">
[pre]pad=w=10+iw:h=10+ih:x=512:y=512:color=black[pip]; </span><span class="se">\</span><span class="s2">
[main][pip] overlay=main_w/20:main_h/20"</span> <span class="se">\</span>
<span class="nt">-vcodec</span> h264 <span class="nt">-c</span>:a aac pip_sharpened.mp4
</code></pre></div></div>

<h2 id="references">References</h2>
<p><a href="https://www.oodlestechnologies.com/blogs/PICTURE-IN-PICTURE-effect-using-FFMPEG/">https://www.oodlestechnologies.com/blogs/PICTURE-IN-PICTURE-effect-using-FFMPEG/</a></p>]]></content><author><name></name></author><category term="Cycling" /><category term="Computing" /><summary type="html"><![CDATA[Update: I have now published a GitHub gist that automates the video processing described below, and can run against my video files immiediately after each ride to create a single, time-synchronised video output. Recently I decided to get some video cameras for my bike. These cameras, filming both the front and rear of my bike, capture footage in 5 minute long files. Though there is an app that comes with my cameras, and they are both made by the same manufacturer, there is no way to easily combine a long ride into a single video for easy (or uneasy) viewing. I set about creating a workflow to make a complete video of my rides. My desired end goal looks something like this (the image layout, not the impending sense of doom): Another beautiful day by the beach.]]></summary><media:thumbnail xmlns:media="http://search.yahoo.com/mrss/" url="https://blog.joelbuckley.com.au/assets/images/2023-bike-camera-workflow/endgoal.jpg" /><media:content medium="image" url="https://blog.joelbuckley.com.au/assets/images/2023-bike-camera-workflow/endgoal.jpg" xmlns:media="http://search.yahoo.com/mrss/" /></entry><entry><title type="html">Docker folder permissions aren’t dynamic</title><link href="https://blog.joelbuckley.com.au/2022/12/til-docker-folder-permissions-arent-dynamic" rel="alternate" type="text/html" title="Docker folder permissions aren’t dynamic" /><published>2022-12-29T00:00:00+00:00</published><updated>2022-12-29T00:00:00+00:00</updated><id>https://blog.joelbuckley.com.au/2022/12/til-docker-folder-permissions-arent-dynamic</id><content type="html" xml:base="https://blog.joelbuckley.com.au/2022/12/til-docker-folder-permissions-arent-dynamic"><![CDATA[<p>While testing the final setup of the folders monitored by my <a href="https://www.mayan-edms.com/">Mayan EDMS</a> installation, I discovered that incorrect folder permissions would stop files from being processed by this document management system. This post explores why some of my troubleshooting assumptions were wrong.</p>

<!--more-->

<h1 id="my-setup">My Setup</h1>
<p>I use <code class="language-plaintext highlighter-rouge">/etc/fstab</code> to mount some directories from an SMB share:</p>
<div class="language-plaintext highlighter-rouge"><div class="highlight"><pre class="highlight"><code>//&lt;smb host&gt;/docker/mayan-edms/correspondence /mnt/docker/mayan-edms/correspondence cifs uid=1000,gid=1000,file_mode=0755,dir_mode=0755,vers=3.0,credentials=&lt;credentials file&gt;
</code></pre></div></div>

<h1 id="findings">Findings</h1>
<ol>
  <li>If the permissions (owner, group and permission flags) of a folder mounted as a <code class="language-plaintext highlighter-rouge">docker</code> volume are changed on the host after the container is started, then those changed permissions will <strong>not</strong> be reflected in the container.</li>
  <li>Corollary: if a container is started and points to a directory that is subsequently used as a <code class="language-plaintext highlighter-rouge">mount</code> point on the host, then the permissions in that container for that volume will be those from the folder before the mounting took place. Though the folder may look, on the host, to have changed completely after running <code class="language-plaintext highlighter-rouge">mount</code>, the <code class="language-plaintext highlighter-rouge">docker</code> container will not reflect this until it is restarted.</li>
</ol>

<h1 id="result">Result</h1>
<p>The lesson from this is to establish all mounts and their permissions before starting <code class="language-plaintext highlighter-rouge">docker</code> containers.</p>]]></content><author><name></name></author><category term="TIL" /><category term="docker" /><summary type="html"><![CDATA[While testing the final setup of the folders monitored by my Mayan EDMS installation, I discovered that incorrect folder permissions would stop files from being processed by this document management system. This post explores why some of my troubleshooting assumptions were wrong.]]></summary></entry><entry><title type="html">Docker default address pools</title><link href="https://blog.joelbuckley.com.au/2022/12/til-docker-default-address-pools" rel="alternate" type="text/html" title="Docker default address pools" /><published>2022-12-28T00:00:00+00:00</published><updated>2022-12-28T00:00:00+00:00</updated><id>https://blog.joelbuckley.com.au/2022/12/til-docker-default-address-pools</id><content type="html" xml:base="https://blog.joelbuckley.com.au/2022/12/til-docker-default-address-pools"><![CDATA[<p>While migrating my <a href="https://www.mayan-edms.com/">Mayan EDMS</a> docker containers from one host to another, I had intermittent network connectivity problems between the <code class="language-plaintext highlighter-rouge">docker</code> host and an entire VLAN at home. I use a large part of the <code class="language-plaintext highlighter-rouge">192.168.0.0/16</code> subnet, and was surprised to find that this can easily clash with a default docker configuration after a few networks are created.</p>

<p>I recommend that this default address-space setting is assessed immediately after installing <code class="language-plaintext highlighter-rouge">docker</code>.</p>

<h1 id="problem">Problem</h1>

<p><code class="language-plaintext highlighter-rouge">docker-compose</code> will eventually clash with your network if you use any IPs in the range <code class="language-plaintext highlighter-rouge">192.168.0.0/16</code>. This is most residential setups.</p>

<h1 id="explanation">Explanation</h1>
<p>As explained in Matthew Strasiotto’s <a href="https://straz.to/2021-09-08-docker-address-pools/">thorough post</a> about the situation, the default configuration of what docker uses for address space might look like this:</p>
<div class="language-json highlighter-rouge"><div class="highlight"><pre class="highlight"><code><span class="p">{</span><span class="w">
  </span><span class="nl">"default-address-pools"</span><span class="w"> </span><span class="p">:</span><span class="w"> </span><span class="p">[</span><span class="w">
    </span><span class="p">{</span><span class="w">
      </span><span class="nl">"base"</span><span class="w"> </span><span class="p">:</span><span class="w"> </span><span class="s2">"172.17.0.0/12"</span><span class="p">,</span><span class="w">
      </span><span class="nl">"size"</span><span class="w"> </span><span class="p">:</span><span class="w"> </span><span class="mi">20</span><span class="w">
    </span><span class="p">},</span><span class="w">
    </span><span class="p">{</span><span class="w">
      </span><span class="nl">"base"</span><span class="w"> </span><span class="p">:</span><span class="w"> </span><span class="s2">"192.168.0.0/16"</span><span class="p">,</span><span class="w">
      </span><span class="nl">"size"</span><span class="w"> </span><span class="p">:</span><span class="w"> </span><span class="mi">24</span><span class="w">
    </span><span class="p">}</span><span class="w">
  </span><span class="p">]</span><span class="w">
</span><span class="p">}</span><span class="w">
</span></code></pre></div></div>

<p>This means <code class="language-plaintext highlighter-rouge">192.168.0.1 to 192.168.255.254</code> could be used by <code class="language-plaintext highlighter-rouge">docker</code>, and create a clash with any other device in your home that already has an address like <code class="language-plaintext highlighter-rouge">192.168.1.30</code>. For many homes, IP addresses like this will definitely be in use. Care must be taken to ensure no address space clashes evolve.</p>

<h1 id="resolution">Resolution</h1>
<p>Fortunately the available address space can be declared in a configuration file. If you are like me and don’t require a lot of <code class="language-plaintext highlighter-rouge">docker</code> networks, you can just delete the <code class="language-plaintext highlighter-rouge">192.168.0.0/16</code> entry. Alternatively you might like to carve out/add networks in the JSON file.</p>

<p>You will want to ensure that any IP ranges you provide are defined in <a href="https://www.rfc-editor.org/rfc/rfc1918">RFC 1918</a>, to ensure no address clashes with hosts out on the internet.</p>

<p>A restart of the <code class="language-plaintext highlighter-rouge">docker</code> service is likely required to effect the changes made to the JSON file.</p>

<h3 id="linux-configuration-file-path">Linux Configuration File Path</h3>
<p><code class="language-plaintext highlighter-rouge">/etc/docker/daemon.json
</code></p>
<h3 id="synology-configuration-file-path">Synology Configuration File Path</h3>
<p><code class="language-plaintext highlighter-rouge">/var/packages/Docker/etc/dockerd.json
</code></p>
<h2 id="resources">Resources</h2>
<ol>
  <li><a href="https://straz.to/2021-09-08-docker-address-pools/">https://straz.to/2021-09-08-docker-address-pools/</a></li>
  <li><a href="https://github.com/docker/compose/issues/4336">https://github.com/docker/compose/issues/4336</a></li>
</ol>]]></content><author><name></name></author><category term="TIL" /><category term="docker" /><category term="IPv4" /><summary type="html"><![CDATA[While migrating my Mayan EDMS docker containers from one host to another, I had intermittent network connectivity problems between the docker host and an entire VLAN at home. I use a large part of the 192.168.0.0/16 subnet, and was surprised to find that this can easily clash with a default docker configuration after a few networks are created. I recommend that this default address-space setting is assessed immediately after installing docker. Problem docker-compose will eventually clash with your network if you use any IPs in the range 192.168.0.0/16. This is most residential setups. Explanation As explained in Matthew Strasiotto’s thorough post about the situation, the default configuration of what docker uses for address space might look like this: { "default-address-pools" : [ { "base" : "172.17.0.0/12", "size" : 20 }, { "base" : "192.168.0.0/16", "size" : 24 } ] } This means 192.168.0.1 to 192.168.255.254 could be used by docker, and create a clash with any other device in your home that already has an address like 192.168.1.30. For many homes, IP addresses like this will definitely be in use. Care must be taken to ensure no address space clashes evolve. Resolution Fortunately the available address space can be declared in a configuration file. If you are like me and don’t require a lot of docker networks, you can just delete the 192.168.0.0/16 entry. Alternatively you might like to carve out/add networks in the JSON file. You will want to ensure that any IP ranges you provide are defined in RFC 1918, to ensure no address clashes with hosts out on the internet. A restart of the docker service is likely required to effect the changes made to the JSON file. Linux Configuration File Path /etc/docker/daemon.json Synology Configuration File Path /var/packages/Docker/etc/dockerd.json Resources https://straz.to/2021-09-08-docker-address-pools/ https://github.com/docker/compose/issues/4336]]></summary></entry><entry><title type="html">SOGo webmail permissions</title><link href="https://blog.joelbuckley.com.au/2022/12/til-sogo-permissions" rel="alternate" type="text/html" title="SOGo webmail permissions" /><published>2022-12-20T00:00:00+00:00</published><updated>2022-12-20T00:00:00+00:00</updated><id>https://blog.joelbuckley.com.au/2022/12/til-sogo-permissions</id><content type="html" xml:base="https://blog.joelbuckley.com.au/2022/12/til-sogo-permissions"><![CDATA[<p>Inspired by <a href="https://til.simonwillison.net/">Simon Willison</a>, I have decided to sometimes post in more targeted ways to try and reflect quick, useful things I have picked up.</p>

<p>This post is about how to manage the permissions of a calendar within a <a href="https://www.sogo.nu/">SOGo</a> installation when you can’t directly access the resource from a web interface. SOGo is the default webmail interface on <a href="https://mailcow.email/">Mailcow</a>, a popular docker-based self-hosted email solution.</p>

<p>The situation of not being able to access the resource is commonplace for non-mailbox resources created in Mailcow (e.g. a meeting room type resource).</p>

<!--more-->

<h1 id="mailcow-access">Mailcow Access</h1>
<p>If using Mailcow, you will need to enter the docker image first and get a command prompt there:<br />
<code class="language-plaintext highlighter-rouge">docker exec -it -u sogo mailcowdockerized-sogo-mailcow-1 bash</code></p>

<h1 id="interrogating">Interrogating</h1>
<p>Once in a position to run the command, you can interrogate existing permissions:<br />
<code class="language-plaintext highlighter-rouge">sogo-tool manage-acl get Resource-name@example.com Calendar/personal ALL</code></p>

<p><code class="language-plaintext highlighter-rouge">Calendar/personal</code> is the default calendar, so this will be correct unless you have created other calendars under this resource (beyond the scope of this TIL).</p>

<h1 id="adding-permissions">Adding permissions</h1>
<p>There are a range of permissions to add, made up from a combination between the following two sets: 
<strong>(Public, Confidential and Private)</strong> and <strong>(DandTViewer and Viewer)</strong>. For example, <code class="language-plaintext highlighter-rouge">PublicDandTViewer</code> allows only the blocks of availability to be seen by a user for Public events; <code class="language-plaintext highlighter-rouge">ConfidentialViewer</code> allows the user to view all details of a Confidential event.</p>

<p>Once you have decided on what to apply for a user (provided in the command below as <code class="language-plaintext highlighter-rouge">me@example.com</code>), the command uses the following format:<br />
<code class="language-plaintext highlighter-rouge">sogo-tool manage-acl add Resource@example.com Calendar/personal me@example.com '["PublicViewer", "ConfidentialDandTViewer"]'</code></p>

<h4 id="anonymous-users">Anonymous users:</h4>
<p><code class="language-plaintext highlighter-rouge">sogo-tool manage-acl add Resource@example.com Calendar/personal anonymous '["PublicDandTViewer"]'</code></p>

<h4 id="defaults">Defaults:</h4>
<p>The documentation allows the specification <strong>ALL</strong> and <strong>&lt;default&gt;</strong> in place of the user field; I am not currently sure of the difference and determining this is left as an excercise for the reader.</p>

<h1 id="resources">Resources</h1>
<ol>
  <li><a href="https://users.sogo.narkive.com/7zcEpmvy/sogo-modifying-acl-s-via-sogo-tool">https://users.sogo.narkive.com/7zcEpmvy/sogo-modifying-acl-s-via-sogo-tool</a></li>
  <li><a href="https://github.com/mailcow/mailcow-dockerized/issues/4699">https://github.com/mailcow/mailcow-dockerized/issues/4699</a></li>
  <li><a href="https://docs.iredmail.org/sogo.manage.resources.html">https://docs.iredmail.org/sogo.manage.resources.html</a></li>
</ol>]]></content><author><name></name></author><category term="TIL" /><category term="sogo" /><category term="webmail" /><summary type="html"><![CDATA[Inspired by Simon Willison, I have decided to sometimes post in more targeted ways to try and reflect quick, useful things I have picked up. This post is about how to manage the permissions of a calendar within a SOGo installation when you can’t directly access the resource from a web interface. SOGo is the default webmail interface on Mailcow, a popular docker-based self-hosted email solution. The situation of not being able to access the resource is commonplace for non-mailbox resources created in Mailcow (e.g. a meeting room type resource).]]></summary></entry><entry><title type="html">Integrating a VT220 (or similar DEC terminal) into my OS X workflow | Part 3</title><link href="https://blog.joelbuckley.com.au/2021/08/os-x-vt220-part-3" rel="alternate" type="text/html" title="Integrating a VT220 (or similar DEC terminal) into my OS X workflow | Part 3" /><published>2021-08-01T00:00:00+00:00</published><updated>2021-08-01T00:00:00+00:00</updated><id>https://blog.joelbuckley.com.au/2021/08/os-x-vt220-part-3</id><content type="html" xml:base="https://blog.joelbuckley.com.au/2021/08/os-x-vt220-part-3"><![CDATA[<p><em>This post is the third in a series on my integration with a VT220-like (VT510) terminal, as my ‘daily driver’. <a href="/archives/732">The first post in this series is available here</a>.</em></p>

<!--more-->

<h2 id="rss">RSS</h2>
<p>Some say RSS or “Really Simple Syndication” is dead, but I think you just need to know where to look for feeds. A lot of modern content management systems (CMSs) have RSS feeds built in, so some organisations may unwittingly publish them. Many more still choose to publish RSS with a small summary of their articles, baiting readers to click on the link for more. (Tangentially, <a href="https://github.com/lformella/rss-extender">this can be gotten around if you’d prefer to read everything in your RSS reader without going to an external website</a>.)</p>

<p>I have RSS feeds from news organisations and blogs that I follow, and I like being able to effortlessly check in on these throughout my week. I use <code class="language-plaintext highlighter-rouge">newsboat</code> (formerly <code class="language-plaintext highlighter-rouge">newsbeuter</code>) to do this.</p>

<h3 id="bookmarking-integration-with-pinboard">Bookmarking (Integration with <a href="https://pinboard.in">Pinboard</a>)</h3>
<p>I’ve used Pinbaord for more than 10 years and it’s a great example of a website that continues to does what it says on the tin. It has an API that allows me to send my links to it from the command line. The script that I use, for RSS and web browsing (discussed more later on) is shown below. I have modified this script to enable Lynx to use it as well as newsboat.</p>

<div class="language-bash highlighter-rouge"><div class="highlight"><pre class="highlight"><code><span class="o">!</span>/bin/sh
<span class="c"># newsbeuter bookmarking plugin for pinboard</span>
<span class="c"># (c) 2007 Andreas Krennmair</span>
<span class="c"># documentation: https://pinboard.in/api</span>

<span class="nv">username</span><span class="o">=</span><span class="s2">"YYY"</span>
<span class="nv">token</span><span class="o">=</span><span class="s2">"XXX"</span>

<span class="nv">mode</span><span class="o">=</span><span class="s2">"</span><span class="nv">$1</span><span class="s2">"</span>

<span class="k">case</span> <span class="nv">$mode</span> <span class="k">in</span>
        <span class="s2">"newsboat"</span><span class="p">)</span>
        <span class="nv">url</span><span class="o">=</span><span class="s2">"</span><span class="nv">$2</span><span class="s2">"</span>
        <span class="nv">title</span><span class="o">=</span><span class="s2">"</span><span class="nv">$3</span><span class="s2">"</span>
        <span class="nv">desc</span><span class="o">=</span><span class="s2">"</span><span class="nv">$4</span><span class="s2">"</span>
        <span class="nv">tag</span><span class="o">=</span><span class="s2">"via:newsbeuter"</span>
        <span class="p">;;</span>

        <span class="s2">"lynx"</span><span class="p">)</span>
        <span class="nv">url</span><span class="o">=</span><span class="nv">$LYNX_PRINT_URL</span>
        <span class="nv">title</span><span class="o">=</span><span class="nv">$LYNX_PRINT_TITLE</span>
        <span class="nv">tag</span><span class="o">=</span><span class="s2">"via:lynx"</span>
        <span class="p">;;</span>

        <span class="s2">"lynx-description"</span><span class="p">)</span>
        <span class="nv">url</span><span class="o">=</span><span class="nv">$LYNX_PRINT_URL</span>
        <span class="nv">title</span><span class="o">=</span><span class="nv">$LYNX_PRINT_TITLE</span>
        <span class="nb">echo</span> <span class="s2">""</span>
        <span class="nb">echo</span> <span class="s2">"Enter description: "</span>
        <span class="nb">read </span>desc
        <span class="nv">tag</span><span class="o">=</span><span class="s2">"via:lynx"</span>
        <span class="p">;;</span>
<span class="k">esac</span>

<span class="nv">output</span><span class="o">=</span><span class="sb">`</span>curl <span class="nt">-G</span> <span class="nt">-s</span> <span class="s2">"https://api.pinboard.in/v1/posts/add"</span> <span class="nt">--data-urlencode</span> <span class="s2">"auth_token=</span><span class="k">${</span><span class="nv">username</span><span class="k">}</span><span class="s2">:</span><span class="k">${</span><span class="nv">token</span><span class="k">}</span><span class="s2">"</span> <span class="nt">--data-urlencode</span> <span class="s2">"url=</span><span class="k">${</span><span class="nv">url</span><span class="k">}</span><span class="s2">"</span> <span class="nt">--data-urlencode</span> <span class="s2">"description=</span><span class="k">${</span><span class="nv">title</span><span class="k">}</span><span class="s2">"</span> <span class="nt">--data-urlencode</span> <span class="s2">"extended=</span><span class="k">${</span><span class="nv">desc</span><span class="k">}</span><span class="s2">"</span> <span class="nt">--data-urlencode</span> <span class="s2">"tags="</span><span class="k">${</span><span class="nv">tag</span><span class="k">}</span><span class="s2">""</span> <span class="nt">--data-urlencode</span> <span class="s2">"toread=yes"</span><span class="sb">`</span>

<span class="nv">output</span><span class="o">=</span><span class="sb">`</span><span class="nb">echo</span> <span class="nv">$output</span> | <span class="nb">sed</span> <span class="s1">'s/^.*code="\([^"]*\)".*$/\1/'</span><span class="sb">`</span>

<span class="k">if</span> <span class="o">[</span> <span class="s2">"</span><span class="nv">$output</span><span class="s2">"</span> <span class="o">!=</span> <span class="s2">"done"</span> <span class="o">]</span> <span class="p">;</span> <span class="k">then
 </span><span class="nb">echo</span> <span class="s2">"</span><span class="nv">$output</span><span class="s2">"</span>
<span class="k">fi</span>
</code></pre></div></div>

<p>In order to save a bookmark in <code class="language-plaintext highlighter-rouge">newsboat</code>, I have the following configuration lines in <code class="language-plaintext highlighter-rouge">~/.config/newsboat/config</code>:</p>

<div class="language-plaintext highlighter-rouge"><div class="highlight"><pre class="highlight"><code># -- bookmarks -----------------------------------------------------------------

bookmark-cmd "~/bin/bookmark.sh newsboat"
bookmark-interactive no
bookmark-autopilot yes
bind-key b bookmark
</code></pre></div></div>

<h3 id="viewing">Viewing</h3>
<p>Sometimes I might want to visit a link directly from <code class="language-plaintext highlighter-rouge">newsboat</code>. Luckily this RSS reader has support for specifying a browser to use. Through the following configuration line in <code class="language-plaintext highlighter-rouge">~/.config/newsboat/config</code>, I set a terminal-based browser (more shortly):</p>

<div class="language-plaintext highlighter-rouge"><div class="highlight"><pre class="highlight"><code>browser "/usr/local/bin/lynx -cfg=~/.config/lynx/lynx.cfg %u"
</code></pre></div></div>

<p>The file <code class="language-plaintext highlighter-rouge">~/.config/lynx/lynx.cfg</code> is an optional argument that allows me to specify a configuation file. It is not necessary.</p>

<h2 id="web-browsing">Web Browsing</h2>

<p>In order to get the most out of Lynx, I’ve found the following settings necessary for general browsing. These include allowing cookies, setting up a jumpfile (more later), a default bookmarks file.</p>

<div class="language-plaintext highlighter-rouge"><div class="highlight"><pre class="highlight"><code>SET_COOKIES:TRUE
ACCEPT_ALL_COOKIES:TRUE
PERSISTENT_COOKIES:TRUE
COOKIE_FILE:~/.cookies
COOKIE_SAVE_FILE:~/.cookies
FORCE_SSL_COOKIES_SECURE:FALSE

JUMPFILE:~/.config/lynx/jumps.html
DEFAULT_BOOKMARK_FILE:~/.config/lynx/lynx_bookmarks.html
BOOKMARK_FILE:~/.config/lynx/lynx_bookmarks.html
DEFAULT_EDITOR:vim
</code></pre></div></div>

<h3 id="bookmarking-pinboardin-integration">Bookmarking (<a href="https://pinboard.in">Pinboard.in</a> integration)</h3>
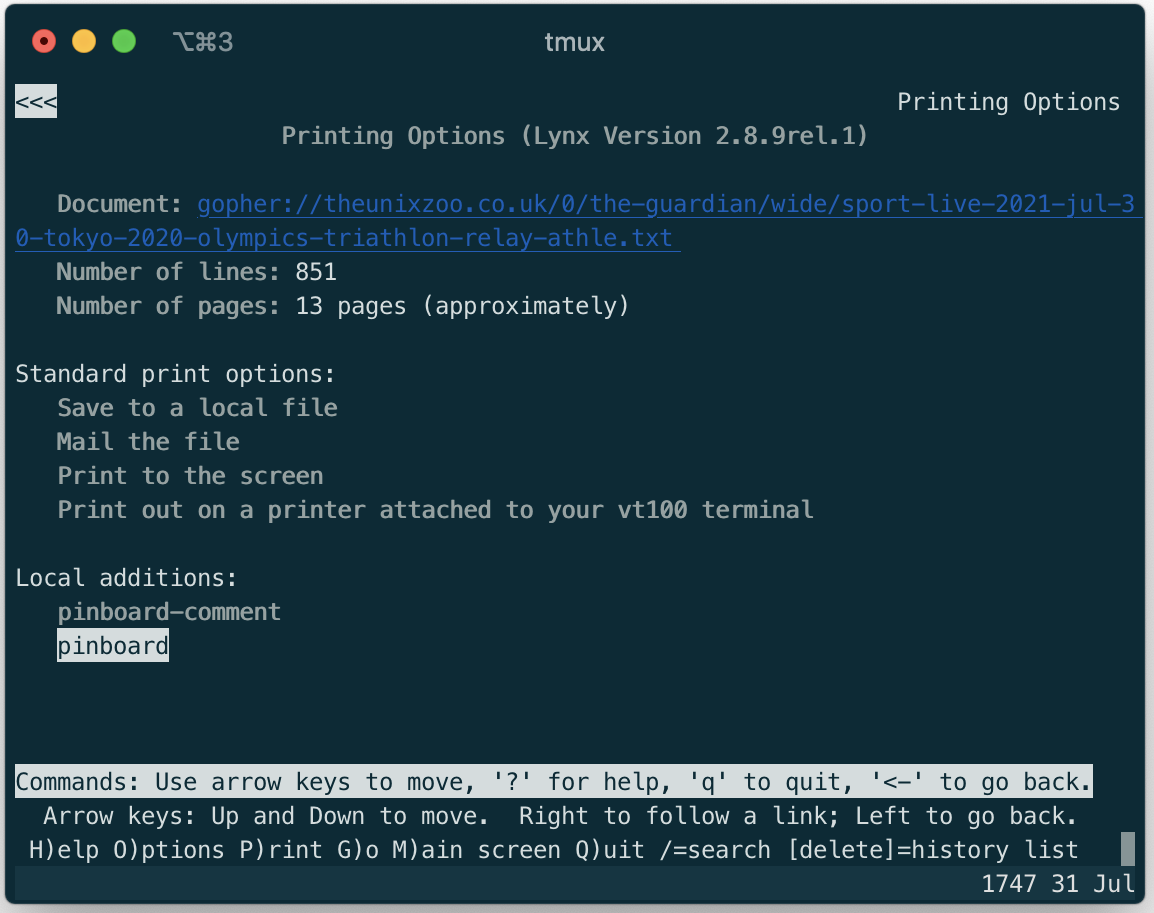
<p>As with my RSS reader, I have managed to make Lynx “support” (somewhat) my desired workflow of saving pages in <a href="https://pinboard.in">pinboard</a>. In order to do this, I added a ‘PRINTER’ output to the browser, and specified this as script. <code class="language-plaintext highlighter-rouge">pinboard-comment</code> asks me (not very graciously) if I would like to add commentary text to send to the API call to Pinboard, which is saved as a comment in the bookmark entry.</p>

<div class="language-plaintext highlighter-rouge"><div class="highlight"><pre class="highlight"><code>PRINTER:pinboard-comment:~/bin/bookmark.sh lynx-description %s:TRUE
PRINTER:pinboard:~/bin/bookmark.sh lynx %s:TRUE
</code></pre></div></div>

<p>Lynx does have a ‘DOWNLOADER’ functionality too, however from what I could determine, this function does not provide access to the necessary <a href="http://osr600doc.sco.com/en/INT_lynxDoc/keystrokes/environments.html">environmental variables that PRINTER does</a> in order to support scripting inputs to the Pinboard API.</p>

<!-- _includes/image.html -->
<div class="image-wrapper">
    
        <img src="https://blog.joelbuckley.com.au/assets/images/2021-08-01-os-x-vt220/lynx-pinboard.png" alt="Screenshot of Lynx terminal in print dialogue, saving bookmark to Pinboard" width="550px" />
    
    
        <p class="image-caption">Saving a bookmark to Pinboard in Lynx</p>
    
</div>

<h3 id="jumpfile">Jumpfile</h3>
<p>A jumpfile is a quick way of defining favourite sites you’d like to be able to access via the keyboard, with a quick typing of <code class="language-plaintext highlighter-rouge">j</code> then a predefined shortcut. For example, the following jumpfile allows me to type <code class="language-plaintext highlighter-rouge">jg&lt;enter&gt;</code> to get to Google quickly, in Lynx:</p>

<div class="language-plaintext highlighter-rouge"><div class="highlight"><pre class="highlight"><code>&lt;html&gt;
&lt;head&gt;
&lt;title&gt;Shortcut List&lt;/title&gt;
&lt;/head&gt;
&lt;body&gt;
    &lt;h1&gt;Shortcut List&lt;/h1&gt;
  &lt;b&gt;Name&lt;/b&gt;&amp;nbsp;&amp;nbsp;&amp;nbsp;&lt;b&gt;Link&lt;/b&gt;
&lt;dl compact&gt;
&lt;dt&gt;?&lt;dd&gt;&lt;a href="file://localhost/Users/joel/.config/lynx/jumps.html"&gt;This Shortcut List&lt;/a&gt;
&lt;dt&gt;g&lt;dd&gt;&lt;a href="https://google.com"&gt;Google&lt;/a&gt;
&lt;/dl&gt;
&lt;/body&gt;
&lt;/html&gt;
</code></pre></div></div>

<p>The setting to enable this jumpfile is <a href="#web-browsing">given in the configuration shown in the previous section</a>.</p>

<p>Various <a href="https://github.com/ThomasDickey/lynx-snapshots/blob/master/samples/jumpsUnix.html">Lynx jumpfiles</a> are available for sampling from the internet.</p>

<h3 id="http10">HTTP/1.0</h3>
<p>The most commonly used version of Hyper Text Transfer Protocol (HTTP) is HTTP/1.1. Correctly implemented servers are required to be backwards compatible with HTTP/1.0 requests, however this unfortunately is not always the case. In particular, while actioning an email this week I was served a 308 (Permanent Redirect) header, which was only defined from HTTP/1.1. Lynx didn’t know what to do, and did not redirect.</p>

<p>This is just a small pitfall to be aware of!</p>

<h3 id="gopher">Gopher</h3>

<p>Gopher was a popular internet protocol, preceeding the World Wide Web. Interestingly, the Gopher protocol is seing somewhat of a resurgence (renaissance?) lately, and Lynx still works with the text-dominated protocol.</p>

<p>Gopher has useful sites that are text-only versions of well-known sites, such as:</p>
<ol>
  <li><a href="gopher://gopherddit.com/">Reddit</a></li>
  <li><a href="gopher://gopher.floodgap.com/0/groundhog/au/nforecast/v/10450">Bureau of Meterology Melbourne Forecast</a></li>
  <li><a href="gopher://hngopher.com/1">Hacker News</a></li>
  <li><a href="gopher://theunixzoo.co.uk/1/the-guardian/wide">The Guardian</a></li>
  <li><a href="gopher://gopherpedia.com/1/">Wikipedia</a></li>
  <li><a href="gopher://gopher.metafilter.com/1/">Metafilter</a></li>
</ol>

<!-- _includes/image.html -->
<div class="image-wrapper">
    
        <img src="https://blog.joelbuckley.com.au/assets/images/2021-08-01-os-x-vt220/lynx-reddit.png" alt="Screenshot of Lynx terminal viewing a Gopher Reddit gateway" width="550px" />
    
    
        <p class="image-caption">Text-only Reddit via Gopher protocol</p>
    
</div>

<p>Gopher is amazingly fast on a 100Mbit connection (as you would expect), and great for privacy (no cookies, ads or monetisation whatsoever).</p>

<h2 id="security">Security</h2>

<h3 id="passwords">Passwords</h3>

<p>I use 1Password, and when it comes to logging into websites, it’s quite easy to integrate this into workflows. For example, once <a href="https://support.1password.com/command-line-getting-started/">setup</a>, you can login and make queries to put your passwords on the clipboard, ready for pasting into Lynx.</p>

<div class="language-bash highlighter-rouge"><div class="highlight"><pre class="highlight"><code><span class="nb">eval</span> <span class="si">$(</span>op signin my<span class="si">)</span>
op get item &lt;item&gt; <span class="nt">--fields</span> password | pbcopy
</code></pre></div></div>

<h3 id="locking-the-screen">Locking the screen</h3>
<p>The VT510 has a feature that dims the screen when content has remained unchanged for approximately 30 minutes. This is great, however with a live-updating clock and news feed on the screen, the display doesn’t discern that this is just ‘background noise’ and it should go to sleep anyway. I wanted a way to quickly and easily shut off the screen. I viewed the benefit of locking the terminal to be a bonus.</p>

<p>I installed <a href="https://github.com/acornejo/bashlock">bashlock</a> and bound it to the <code class="language-plaintext highlighter-rouge">tmux</code> combination of control-x. This displays a static ‘please log in’ screen, enabling the monitor to turn itself down to save itself.</p>

<div class="language-plaintext highlighter-rouge"><div class="highlight"><pre class="highlight"><code># Screen lock
bind-key -n C-x lock-server
set-option -g   lock-after-time 0
#set-option -g   lock-server on
set-option -g   lock-command "~/bin/bashlock/bashlock"
</code></pre></div></div>

<p>I did make some changes to <code class="language-plaintext highlighter-rouge">bashlock</code>, as I found that the VT510 would not reconnect after being ‘locked’. The VT510 also doesn’t display any feedback until the terminal is successfully unlocked. I’m not sure why right now.</p>

<p>I added the following line to the near-bottom of <code class="language-plaintext highlighter-rouge">/etc/sudoers</code>, to allow my user (who runs <code class="language-plaintext highlighter-rouge">bashlock</code> to run <code class="language-plaintext highlighter-rouge">launchctl</code>):</p>
<div class="language-plaintext highlighter-rouge"><div class="highlight"><pre class="highlight"><code>joel		ALL = (root) NOPASSWD:NOEXEC: /bin/launchctl
</code></pre></div></div>

<p>and made the following changes to a part of <code class="language-plaintext highlighter-rouge">bashlock</code>:</p>
<div class="language-bash highlighter-rouge"><div class="highlight"><pre class="highlight"><code>        <span class="k">if</span> <span class="o">[</span> <span class="s2">"</span><span class="nv">$?</span><span class="s2">"</span> <span class="nt">-eq</span> 0 <span class="o">]</span><span class="p">;</span> <span class="k">then
            </span><span class="nb">echo</span> <span class="s2">"Welcome back!"</span>
            <span class="nb">echo</span> <span class="s2">""</span>
		    <span class="nb">sudo </span>launchctl unload <span class="nt">-F</span> /Library/LaunchDaemons/serialconsole.plist
		    <span class="nb">sudo </span>launchctl load <span class="nt">-F</span> /Library/LaunchDaemons/serialconsole.plist
            <span class="nb">exit </span>0
        <span class="k">else</span>
</code></pre></div></div>

<p>This reboots the Launch Daemon, and kicks the VT510 into action again after unlocking. Meanwhile the screen stays nice and static when I remember to lock the terminal for long periods away, ensuring that CRT burn-in is minimised.</p>

<h1 id="result">Result</h1>
<p>This is the end of my series on my DEC terminal. I hope this shows you the power of a text-based approach to computing, and the remarkable ability for 30+ year old hardware to still be useful parts of our modern lives.</p>

<!-- _includes/image.html -->
<div class="image-wrapper">
    
        <img src="https://blog.joelbuckley.com.au/assets/images/2021-08-01-os-x-vt220/gopher.jpg" alt="Photo of VT510 displaying a Gopher page via Lynx" />
    
    
        <p class="image-caption">Shot of VT510 displaying a Gopher page via Lynx</p>
    
</div>

<h1 id="more-information">More Information</h1>
<ol>
  <li><a href="https://newsboat.org/releases/2.24/docs/newsboat.html">Newsboat Documentation</a></li>
  <li><a href="https://lynx.invisible-island.net/lynx2.8.3/breakout/lynx_help/keystrokes/keystroke_help.html">Lynx key commands</a></li>
  <li><a href="https://lynx.invisible-island.net/lynx2.8.3/breakout/lynx_help/Lynx_users_guide.html">Lynx user guide</a></li>
  <li><a href="https://github.com/ThomasDickey/lynx-snapshots/blob/master/samples/jumpsUnix.html">Sample Lynx jumpfile</a></li>
  <li><a href="https://lists.nongnu.org/archive/html/lynx-dev/2005-04/msg00023.html">Lynx multi-bookmarks (not implemented here)</a></li>
  <li><a href="http://osr600doc.sco.com/en/INT_lynxDoc/keystrokes/environments.html">Lynx print script variables</a></li>
  <li><a href="https://stackoverflow.com/a/10021487/3408498">Scripting print functionality in Lynx</a></li>
  <li><a href="https://support.1password.com/command-line-getting-started/">1Password CLI</a></li>
  <li><a href="https://medium.com/@codenameyau/how-to-copy-and-paste-in-terminal-c88098b5840d">pbcopy</a></li>
</ol>]]></content><author><name></name></author><category term="Computing" /><category term="vt220" /><category term="vt510" /><category term="command line" /><category term="automation" /><summary type="html"><![CDATA[This post is the third in a series on my integration with a VT220-like (VT510) terminal, as my ‘daily driver’. The first post in this series is available here.]]></summary></entry><entry><title type="html">Integrating a VT220 (or similar DEC terminal) into my OS X workflow | Part 2</title><link href="https://blog.joelbuckley.com.au/2021/07/os-x-vt220-part-2" rel="alternate" type="text/html" title="Integrating a VT220 (or similar DEC terminal) into my OS X workflow | Part 2" /><published>2021-07-31T00:00:00+00:00</published><updated>2021-07-31T00:00:00+00:00</updated><id>https://blog.joelbuckley.com.au/2021/07/os-x-vt220-part-2</id><content type="html" xml:base="https://blog.joelbuckley.com.au/2021/07/os-x-vt220-part-2"><![CDATA[<p><em>This post is the second in a series on my integration with a VT220-like (VT510) terminal, as my ‘daily driver’. <a href="/archives/732">The first post in this series is available here</a>.</em></p>

<!--more-->

<h1 id="applications">Applications</h1>

<p>The tasks I am able to perform on my terminal are quite varied. I can</p>
<ol>
  <li>Check my email and file it <em>extremely quickly</em>, using <code class="language-plaintext highlighter-rouge">mutt</code>. This includes advanced features like S/MIME and GPG encryption, full-text search (extremely fast!), and dealing with mailing lists sensibly.</li>
  <li>Convert my emails to task reminders in my task management tool of choice, <a href="https://www.omnigroup.com/omnifocus/">OmniFocus</a>.</li>
  <li>Read RSS feeds.</li>
  <li>Use the web (and other protocols!) in a text-based browser.</li>
  <li>Do almost anything else you might think to do on the command line (including editing some of this blog post).</li>
</ol>

<p>In this post, I will be exploring <code class="language-plaintext highlighter-rouge">mutt</code>, for regular email reading, writing and management.</p>

<h2 id="tmux-customisation">tmux Customisation</h2>
<p>First things first, the DEC VT510 is a CRT monitor. It is succeptible to burn-in, leaving marks of any frequently-shown text visible on the monitor, even when the power is off. This can be very distracting!</p>

<p>The contents of my <code class="language-plaintext highlighter-rouge">~/.tmux.conf</code> file alleviates this risk by changing from the default status bar with a light background, to one with a dark (black) background, and displaying only a modified clock in the right hand corner — there is no usual list of windows. To remove the window list in the <code class="language-plaintext highlighter-rouge">tmux</code> status bar and perform these other colour customisations, I have the following in my <code class="language-plaintext highlighter-rouge">~/.tmux.conf</code>:</p>
<div class="language-plaintext highlighter-rouge"><div class="highlight"><pre class="highlight"><code># Customise status bar
set -g status on
set -g status-right "%H%M %d %b"
set-option -g status-left ""

set -g status-bg black
set -g status-fg white

set -g window-status-current-format ''
set -g window-status-format ''
</code></pre></div></div>

<p>These commands will work in any any <code class="language-plaintext highlighter-rouge">tmux</code> environment, not just when used on a VT510 terminal.</p>

<h1 id="mutt">Mutt</h1>
<p>My full mutt setup is out of scope of this article, however there are a few features that are useful for me in using the DEC VT510 terminal.</p>

<h2 id="small-screen-big-world">Small screen, big world</h2>
<p>The first issue to contend with was that I didn’t want to be changing <strong>all</strong> of my settings just to accomodate my VT510. To make things fit the screen, I didn’t want to be using my luxurious 15” screen with the same settings of an 80 column terminal.</p>

<p>Luckily, <code class="language-plaintext highlighter-rouge">mutt</code> allows you add some intelligence to its configuration by referencing shell scripts (however no arguments can be passed). Here’s my terminal-dependent setup in <code class="language-plaintext highlighter-rouge">~/.muttrc</code>:</p>
<div class="language-plaintext highlighter-rouge"><div class="highlight"><pre class="highlight"><code>source '~/.mutt/vt220.sh|'
</code></pre></div></div>

<p>And <code class="language-plaintext highlighter-rouge">vt220.sh</code> itself is:</p>
<div class="language-bash highlighter-rouge"><div class="highlight"><pre class="highlight"><code><span class="k">if</span> <span class="o">[</span> <span class="nv">$TERM</span> <span class="o">=</span> <span class="s2">"vt220"</span> <span class="o">]</span>
<span class="k">then
  </span><span class="nb">echo</span> <span class="s2">"set ascii_chars=yes"</span>
  <span class="nb">echo</span> <span class="s2">"set wrap=80"</span>
  <span class="nb">echo</span> <span class="s2">"set reflow_wrap=80"</span>
  <span class="nb">echo</span> <span class="s2">"set pager_index_lines=5"</span>
<span class="k">fi

if</span> <span class="o">[</span> <span class="sb">`</span>tput cols<span class="sb">`</span> <span class="nt">-lt</span> <span class="s2">"75"</span> <span class="o">]</span>
<span class="k">then
  </span><span class="nb">echo</span> <span class="s2">"set sidebar_visible=no"</span>
<span class="k">fi</span>
</code></pre></div></div>

<h2 id="special-characters">Special Characters</h2>
<p>There are a few settings required to support text-only email reading, particularly on a terminal that doesn’t know a character set such as <a href="https://en.wikipedia.org/wiki/UTF-8">UTF-8</a> (modern character sets support advanced characters like emoji). The DEC VT510 supports mainly ASCII.</p>

<p>To ensure that my emails are as readable as possible, I need to filter out undesireable characters - even a “smart” (curled) quote (e.g. “ — These come in single and double varieties, both openening and closing). I have a regex filter that in my <code class="language-plaintext highlighter-rouge">~/.muttrc</code> is enabled by <code class="language-plaintext highlighter-rouge">set display_filter="~/.mutt/filter.sh"</code>. <code class="language-plaintext highlighter-rouge">filter.sh</code> itself follows:</p>

<div class="language-bash highlighter-rouge"><div class="highlight"><pre class="highlight"><code><span class="c">#!/bin/bash</span>

<span class="nv">output</span><span class="o">=</span><span class="si">$(</span><span class="nb">tee</span><span class="si">)</span>

<span class="c"># Removal of all smart quotes and weird spaces</span>
<span class="nv">output</span><span class="o">=</span><span class="sb">`</span><span class="nb">echo</span> <span class="s2">"</span><span class="nv">$output</span><span class="s2">"</span> | <span class="nb">sed</span> <span class="s2">"s/[’‘]/</span><span class="se">\'</span><span class="s2">/g"</span><span class="sb">`</span>
<span class="nv">output</span><span class="o">=</span><span class="sb">`</span><span class="nb">echo</span> <span class="s2">"</span><span class="nv">$output</span><span class="s2">"</span> | <span class="nb">sed</span> <span class="s1">'s/[”“]/"/g'</span><span class="sb">`</span>
<span class="nv">output</span><span class="o">=</span><span class="sb">`</span><span class="nb">echo</span> <span class="s2">"</span><span class="nv">$output</span><span class="s2">"</span> | <span class="nb">sed</span> <span class="nt">-E</span> <span class="s2">"s/[[:space:]]+/ /g"</span><span class="sb">`</span>

<span class="k">if</span> <span class="o">[</span> <span class="s2">"</span><span class="nv">$TERM</span><span class="s2">"</span> <span class="o">==</span> <span class="s2">"vt220"</span> <span class="o">]</span><span class="p">;</span>
<span class="k">then</span>
        <span class="c"># Start of a project to remove emoji and replace with 'emoticons'</span>
        <span class="nv">output</span><span class="o">=</span><span class="sb">`</span><span class="nb">echo</span> <span class="s2">"</span><span class="nv">$output</span><span class="s2">"</span> | perl <span class="nt">-pCSD</span> <span class="nt">-e</span> <span class="s1">'s/\x{1F600-\x{1F608}/:)/g'</span><span class="sb">`</span>
        <span class="nv">output</span><span class="o">=</span><span class="sb">`</span><span class="nb">echo</span> <span class="s2">"</span><span class="nv">$output</span><span class="s2">"</span> | perl <span class="nt">-pCSD</span> <span class="nt">-e</span> <span class="s1">'s/\N{U+1F609}/;)/g'</span><span class="sb">`</span> <span class="c"># Can also be \x{1F609}</span>
        <span class="nv">output</span><span class="o">=</span><span class="sb">`</span><span class="nb">echo</span> <span class="s2">"</span><span class="nv">$output</span><span class="s2">"</span> | perl <span class="nt">-pCSD</span> <span class="nt">-e</span> <span class="s1">'s/\N{U+20AC}\s?/euro /g'</span><span class="sb">`</span>
        <span class="nv">output</span><span class="o">=</span><span class="sb">`</span><span class="nb">echo</span> <span class="s2">"</span><span class="nv">$output</span><span class="s2">"</span> | perl <span class="nt">-pCSD</span> <span class="nt">-e</span> <span class="s1">'s/\x{1F610}-\x{1F612}/:|/g'</span><span class="sb">`</span>
<span class="k">fi


</span><span class="nb">echo</span> <span class="s2">"</span><span class="nv">$output</span><span class="s2">"</span>
</code></pre></div></div>

<p>This is a work in progress, however fixes a lot of characters that otherwise appear as underscores in my reading of mail.</p>

<h2 id="html-alternatives">HTML Alternatives</h2>
<p>A lot of email today comes as HTML, but often with a text alternative that <code class="language-plaintext highlighter-rouge">mutt</code> and other plaintext programmes can utilise. Often this alternative is just as readible as the HTML (sometimes more so!). Sometimes however, it may be an annoying and terse message telling you only to upgrade your email client to read the HTML email (no chance!). There are ways around this.</p>

<p>In <code class="language-plaintext highlighter-rouge">~/.muttrc</code>, I have:</p>
<div class="language-plaintext highlighter-rouge"><div class="highlight"><pre class="highlight"><code>message-hook . "unalternative_order *; alternative_order text/plain text/enriched text/html"
message-hook '~f bad_sender@domain.com "unalternative_order *; alternative_order text/html"
</code></pre></div></div>
<p>where <code class="language-plaintext highlighter-rouge">bad_sender@domain.com</code> is the name of an inconsiderate sender who does not send useful text email. Looking at you, <a href="https://www.abc.net.au/news/subscribe">ABC</a>!</p>

<p>In <code class="language-plaintext highlighter-rouge">~/.mailcap</code> I have:</p>

<div class="language-plaintext highlighter-rouge"><div class="highlight"><pre class="highlight"><code>text/html; w3m -I %{charset} -T text/html; copiousoutput;
</code></pre></div></div>

<p>This ensures that <code class="language-plaintext highlighter-rouge">mutt</code> knows how to deal with HTML, whenever it is selected (including if you manually select the HTML component of an email).</p>

<h2 id="urls-in-emails">URLs in emails</h2>
<p>Occasionally you may come across emails that contain links you’d like to visit. Mutt can parse these for you, using a helper programme called <code class="language-plaintext highlighter-rouge">urlview</code>. To extact URLs from emails, add the following to your <code class="language-plaintext highlighter-rouge">~/.muttrc</code>:</p>
<div class="language-plaintext highlighter-rouge"><div class="highlight"><pre class="highlight"><code>macro pager \cb &lt;pipe-entry&gt;'urlview'&lt;enter&gt; 'Follow links with urlview'
</code></pre></div></div>

<p>This will allow you to press ‘control-b’ (twice in a row, if using <code class="language-plaintext highlighter-rouge">tmux</code>) and extract URLs in an email. By default these will be opened by your nearest web browser — if you’re on a VT510 that’s not preferable! To confiure <code class="language-plaintext highlighter-rouge">urlview</code>, create the file <code class="language-plaintext highlighter-rouge">~/.urlview</code>:</p>
<div class="language-plaintext highlighter-rouge"><div class="highlight"><pre class="highlight"><code>COMMAND /usr/local/bin/lynx -cfg=~/.config/lynx/lynx.cfg %s
</code></pre></div></div>

<p>This will launch the text-based browser <code class="language-plaintext highlighter-rouge">lynx</code> with the url selected from <code class="language-plaintext highlighter-rouge">urlview</code> in mutt. You may remove the <code class="language-plaintext highlighter-rouge">-cfg</code> portion of the command — this specifies a configuration file (<a href="#web-browsing">more on this later</a>).</p>

<h2 id="task-management">Task Management</h2>
<p>Emails are often the first notification of needing to complete a task, often administrative and easily batched, and whose optimal execution time does not often coincide with their arrival in my inbox. I like to keep a clean inbox, but keep track of things I have to do. To do this, I have a series of scripts that allow me to place tasks (and references to their genesis, email) in OmniFocus. I further have a button in OmniFocus that allows me to select a task and view the email that it came from.</p>

<p>Without detailing them here, these features rely on my <code class="language-plaintext highlighter-rouge">mutt</code> setup using <a href="https://www.offlineimap.org/"><code class="language-plaintext highlighter-rouge">offlineimap</code></a> for keeping a copy of my email locally, and <a href="https://johngodlee.github.io/2019/01/05/notmuch-mutt.html"><code class="language-plaintext highlighter-rouge">notmuch</code></a> for fulltext search.</p>

<p>To create a task from an email, I press control-l on my keyboard. <code class="language-plaintext highlighter-rouge">~/.muttrc</code> is configured to execute a script to pipe this for text input</p>
<div class="language-plaintext highlighter-rouge"><div class="highlight"><pre class="highlight"><code>macro index,pager \cL "&lt;enter-command&gt;unset wait_key&lt;enter&gt;&lt;pipe-message&gt;mutt-to-omnifocus.py&lt;enter&gt;" \
        "Create OmniFocus task from message"
</code></pre></div></div>

<p>The script <code class="language-plaintext highlighter-rouge">mutt-to-omnifocus.py</code> is the following code. I did not write this, but I have somewhat modified it to support emails with encoded subjects. I have forgotten where I obtained it so I am unable to credit, sorry.</p>
<div class="language-python highlighter-rouge"><div class="highlight"><pre class="highlight"><code><span class="c1">#!/usr/bin/env python
</span>
<span class="kn">import</span> <span class="nn">sys</span>
<span class="kn">import</span> <span class="nn">os</span>
<span class="kn">import</span> <span class="nn">getopt</span>
<span class="kn">import</span> <span class="nn">email.parser</span>
<span class="kn">import</span> <span class="nn">subprocess</span>
<span class="kn">from</span> <span class="nn">email.header</span> <span class="kn">import</span> <span class="n">decode_header</span>
<span class="kn">import</span> <span class="nn">re</span>

<span class="k">def</span> <span class="nf">usage</span><span class="p">():</span>
    <span class="k">print</span> <span class="s">"""
    Take an RFC-compliant e-mail message on STDIN and add a
    corresponding task to the OmniFocus inbox for it.

    Options:
        -h, --help
            Display this help text.

        -q, --quick-entry
            Use the quick entry panel instead of directly creating a task.
    """</span>

<span class="k">def</span> <span class="nf">applescript_escape</span><span class="p">(</span><span class="n">string</span><span class="p">):</span>
    <span class="s">"""Applescript requires backslashes and double quotes to be escaped in 
    string.  This returns the escaped string.
    """</span>
    <span class="k">if</span> <span class="n">string</span> <span class="ow">is</span> <span class="ow">not</span> <span class="bp">None</span><span class="p">:</span>
        <span class="c1"># Backslashes first (else you end up escaping your escapes)
</span>        <span class="n">string</span> <span class="o">=</span> <span class="n">string</span><span class="p">.</span><span class="n">replace</span><span class="p">(</span><span class="s">'</span><span class="se">\\</span><span class="s">'</span><span class="p">,</span> <span class="s">'</span><span class="se">\\\\</span><span class="s">'</span><span class="p">)</span>

        <span class="c1"># Then double quotes
</span>        <span class="n">string</span> <span class="o">=</span> <span class="n">string</span><span class="p">.</span><span class="n">replace</span><span class="p">(</span><span class="s">'"'</span><span class="p">,</span> <span class="s">'</span><span class="se">\\</span><span class="s">"'</span><span class="p">)</span>

    <span class="k">return</span> <span class="n">string</span>

<span class="k">def</span> <span class="nf">parse_message</span><span class="p">(</span><span class="n">raw</span><span class="p">):</span>
    <span class="s">"""Parse a string containing an e-mail and produce a list containing the
    significant headers.  Each element is a tuple containing the name and 
    content of the header (list of tuples rather than dictionary to preserve
    order).
    """</span>

    <span class="c1"># Create a Message object
</span>    <span class="n">message</span> <span class="o">=</span> <span class="n">email</span><span class="p">.</span><span class="n">parser</span><span class="p">.</span><span class="n">Parser</span><span class="p">().</span><span class="n">parsestr</span><span class="p">(</span><span class="n">raw</span><span class="p">,</span> <span class="n">headersonly</span><span class="o">=</span><span class="bp">True</span><span class="p">)</span>

    <span class="c1"># Escape special shell characters
</span>    <span class="c1">#applescript2 = re.sub("(!|\$|#|&amp;|\"|\'|\(|\)|\||&lt;|&gt;|`|\\\|;)", r"\\\1", applescript)
</span>
    <span class="c1"># Extract relevant headers
</span>    <span class="nb">list</span> <span class="o">=</span> <span class="p">[(</span><span class="s">"Date"</span><span class="p">,</span> <span class="n">message</span><span class="p">.</span><span class="n">get</span><span class="p">(</span><span class="s">"Date"</span><span class="p">)),</span>
            <span class="p">(</span><span class="s">"From"</span><span class="p">,</span> <span class="n">message</span><span class="p">.</span><span class="n">get</span><span class="p">(</span><span class="s">"From"</span><span class="p">)),</span>
    <span class="c1">#        ("Subject", message.get("Subject")),
</span>            <span class="p">(</span><span class="s">"Message-ID"</span><span class="p">,</span> <span class="n">message</span><span class="p">.</span><span class="n">get</span><span class="p">(</span><span class="s">"Message-ID"</span><span class="p">))]</span>
    <span class="k">try</span><span class="p">:</span>
        <span class="n">sub</span><span class="p">,</span> <span class="n">encoding</span>  <span class="o">=</span> <span class="n">decode_header</span><span class="p">(</span><span class="n">message</span><span class="p">.</span><span class="n">get</span><span class="p">(</span><span class="s">"Subject"</span><span class="p">))[</span><span class="mi">0</span><span class="p">]</span>

        <span class="n">sub</span> <span class="o">=</span> <span class="n">sub</span><span class="p">.</span><span class="n">replace</span><span class="p">(</span><span class="s">'</span><span class="se">\n</span><span class="s">'</span><span class="p">,</span> <span class="s">''</span><span class="p">);</span>
        <span class="n">pipe</span> <span class="o">=</span> <span class="n">subprocess</span><span class="p">.</span><span class="n">Popen</span><span class="p">([</span><span class="s">'/Users/joel/bin/item_name.sh'</span><span class="p">,</span> <span class="n">sub</span><span class="p">],</span> <span class="n">stdout</span><span class="o">=</span><span class="n">subprocess</span><span class="p">.</span><span class="n">PIPE</span><span class="p">)</span>
        <span class="n">subject</span><span class="p">,</span> <span class="n">error</span> <span class="o">=</span> <span class="n">pipe</span><span class="p">.</span><span class="n">communicate</span><span class="p">()</span>
        <span class="nb">list</span><span class="p">.</span><span class="n">append</span><span class="p">((</span><span class="s">"Subject"</span><span class="p">,</span> <span class="n">subject</span><span class="p">.</span><span class="n">rstrip</span><span class="p">(</span><span class="s">'</span><span class="se">\n</span><span class="s">'</span><span class="p">)))</span>
    <span class="k">except</span> <span class="nb">KeyboardInterrupt</span><span class="p">:</span>
        <span class="k">print</span> <span class="s">""</span>
        <span class="n">sys</span><span class="p">.</span><span class="nb">exit</span><span class="p">()</span>

    <span class="k">return</span> <span class="nb">list</span>

<span class="k">def</span> <span class="nf">send_to_omnifocus</span><span class="p">(</span><span class="n">params</span><span class="p">,</span> <span class="n">quickentry</span><span class="o">=</span><span class="bp">False</span><span class="p">):</span>
    <span class="s">"""Take the list of significant headers and create an OmniFocus inbox item
    from these.
    """</span>

    <span class="c1"># name and note of the task (escaped as per applescript_escape())
</span>    <span class="n">name</span> <span class="o">=</span> <span class="s">"%s"</span> <span class="o">%</span> <span class="n">applescript_escape</span><span class="p">(</span><span class="nb">dict</span><span class="p">(</span><span class="n">params</span><span class="p">)[</span><span class="s">"Subject"</span><span class="p">])</span>
    <span class="n">note</span> <span class="o">=</span> <span class="s">"</span><span class="se">\n</span><span class="s">"</span><span class="p">.</span><span class="n">join</span><span class="p">([</span><span class="s">"%s: %s"</span> <span class="o">%</span> <span class="p">(</span><span class="n">k</span><span class="p">,</span> <span class="n">applescript_escape</span><span class="p">(</span><span class="n">v</span><span class="p">))</span> <span class="k">for</span> <span class="p">(</span><span class="n">k</span><span class="p">,</span> <span class="n">v</span><span class="p">)</span> <span class="ow">in</span> <span class="n">params</span><span class="p">])</span>

    <span class="c1"># Write the Applescript
</span>    <span class="k">if</span> <span class="n">quickentry</span><span class="p">:</span>
        <span class="n">applescript</span> <span class="o">=</span> <span class="s">"""
            tell application "OmniFocus"
                tell default document
                    tell quick entry
                        open
                        make new inbox task with properties {name: "%s", note:"%s"}
                        select tree 1
                        set note expanded of tree 1 to true
                    end tell
                end tell
            end tell
        """</span> <span class="o">%</span> <span class="p">(</span><span class="n">name</span><span class="p">,</span> <span class="n">note</span><span class="p">)</span>
    <span class="k">else</span><span class="p">:</span>
        <span class="n">applescript</span> <span class="o">=</span> <span class="s">"""
            tell application "OmniFocus"
                tell default document
                    make new inbox task with properties {name: "%s", note:"%s"}
                end tell
            end tell
        """</span> <span class="o">%</span> <span class="p">(</span><span class="n">name</span><span class="p">,</span> <span class="n">note</span><span class="p">)</span>

    <span class="c1"># Use osascript and a heredoc to run this Applescript
</span>    <span class="n">os</span><span class="p">.</span><span class="n">system</span><span class="p">(</span><span class="s">"</span><span class="se">\n</span><span class="s">"</span><span class="p">.</span><span class="n">join</span><span class="p">([</span><span class="s">"osascript &gt;/dev/null &lt;&lt; 'EOF'"</span><span class="p">,</span> <span class="n">applescript</span><span class="p">,</span> <span class="s">"EOF"</span><span class="p">]))</span>

<span class="k">def</span> <span class="nf">main</span><span class="p">():</span>
    <span class="c1"># Check for options
</span>    <span class="k">try</span><span class="p">:</span>
        <span class="n">opts</span><span class="p">,</span> <span class="n">args</span> <span class="o">=</span> <span class="n">getopt</span><span class="p">.</span><span class="n">getopt</span><span class="p">(</span><span class="n">sys</span><span class="p">.</span><span class="n">argv</span><span class="p">[</span><span class="mi">1</span><span class="p">:],</span> <span class="s">"hq"</span><span class="p">,</span> <span class="p">[</span><span class="s">"help"</span><span class="p">,</span> <span class="s">"quick-entry"</span><span class="p">])</span>
    <span class="k">except</span> <span class="n">getopt</span><span class="p">.</span><span class="n">GetoptError</span><span class="p">:</span>
        <span class="n">usage</span><span class="p">()</span>
        <span class="n">sys</span><span class="p">.</span><span class="nb">exit</span><span class="p">(</span><span class="o">-</span><span class="mi">1</span><span class="p">)</span>

    <span class="c1"># If an option was specified, do the right thing
</span>    <span class="k">for</span> <span class="n">opt</span><span class="p">,</span> <span class="n">arg</span> <span class="ow">in</span> <span class="n">opts</span><span class="p">:</span>
        <span class="k">if</span> <span class="n">opt</span> <span class="ow">in</span> <span class="p">(</span><span class="s">"-h"</span><span class="p">,</span> <span class="s">"--help"</span><span class="p">):</span>
            <span class="n">usage</span><span class="p">()</span>
            <span class="n">sys</span><span class="p">.</span><span class="nb">exit</span><span class="p">(</span><span class="mi">0</span><span class="p">)</span>
        <span class="k">elif</span> <span class="n">opt</span> <span class="ow">in</span> <span class="p">(</span><span class="s">"-q"</span><span class="p">,</span> <span class="s">"--quick-entry"</span><span class="p">):</span>
            <span class="n">raw</span> <span class="o">=</span> <span class="n">sys</span><span class="p">.</span><span class="n">stdin</span><span class="p">.</span><span class="n">read</span><span class="p">()</span>
            <span class="n">send_to_omnifocus</span><span class="p">(</span><span class="n">parse_message</span><span class="p">(</span><span class="n">raw</span><span class="p">),</span> <span class="n">quickentry</span><span class="o">=</span><span class="bp">True</span><span class="p">)</span>
            <span class="n">sys</span><span class="p">.</span><span class="nb">exit</span><span class="p">(</span><span class="mi">0</span><span class="p">)</span>

    <span class="c1"># Otherwise fall back to standard operation
</span>    <span class="n">raw</span> <span class="o">=</span> <span class="n">sys</span><span class="p">.</span><span class="n">stdin</span><span class="p">.</span><span class="n">read</span><span class="p">()</span>
    <span class="n">send_to_omnifocus</span><span class="p">(</span><span class="n">parse_message</span><span class="p">(</span><span class="n">raw</span><span class="p">),</span> <span class="n">quickentry</span><span class="o">=</span><span class="bp">False</span><span class="p">)</span>
    <span class="n">sys</span><span class="p">.</span><span class="nb">exit</span><span class="p">(</span><span class="mi">0</span><span class="p">)</span>

<span class="k">if</span> <span class="n">__name__</span> <span class="o">==</span> <span class="s">"__main__"</span><span class="p">:</span>
    <span class="n">main</span><span class="p">()</span>
</code></pre></div></div>

<p>This script calls a shell script called <code class="language-plaintext highlighter-rouge">item_name.sh</code>, which takes input to determine the task’s name in OmniFocus. The default is <strong>Mutt: &lt;email subject&gt;</strong></p>

<p>OS X has Bash 3 available at <code class="language-plaintext highlighter-rouge">/bin/bash</code>, which will not work for this script. <code class="language-plaintext highlighter-rouge">item_name.sh</code> relies on Bash v5 being installed (typically via homebrew):</p>

<div class="language-bash highlighter-rouge"><div class="highlight"><pre class="highlight"><code><span class="c">#!/usr/local/bin/bash</span>

<span class="nv">RESET</span><span class="o">=</span><span class="s2">"</span><span class="se">\0</span><span class="s2">33[0m"</span>
<span class="nv">BOLD</span><span class="o">=</span><span class="s2">"</span><span class="se">\0</span><span class="s2">33[1m"</span>
<span class="nv">RED</span><span class="o">=</span><span class="s2">"</span><span class="se">\0</span><span class="s2">33[31m"</span>
<span class="nv">MUTT</span><span class="o">=</span><span class="s2">"Mutt: </span><span class="nv">$1</span><span class="s2">"</span>
<span class="nb">read</span> <span class="nt">-e</span> <span class="nt">-p</span> <span class="s2">"</span><span class="si">$(</span><span class="nb">echo</span> <span class="nt">-e</span> <span class="nv">$BOLD$RED</span><span class="s2">"Task Name: "</span><span class="nv">$RESET</span><span class="si">)</span><span class="s2">"</span> <span class="nt">-i</span> <span class="s2">"</span><span class="nv">$MUTT</span><span class="s2">"</span> title &lt;/dev/tty

<span class="nb">echo</span> <span class="s2">"</span><span class="nv">$title</span><span class="s2">"</span>
</code></pre></div></div>

<p>The combination of these two scripts will allow you to enter text to change the name of the task being inserted into OmniFocus, and quickly insert the task into the OmniFocus inbox.</p>

<p>The following AppleScript, when compiled and placed into your OmniFocus script folder (<code class="language-plaintext highlighter-rouge">~/Library/Application Scripts/com.omnigroup.OmniFocus3</code>), will allow you to open a <code class="language-plaintext highlighter-rouge">mutt</code> instances within iTerm.app (my terminal programme of choice). I have to fiddle significantly with the timings (<code class="language-plaintext highlighter-rouge">delay 2</code> statements, etc) — your mileage may vary on your own system.</p>

<div class="language-applescript highlighter-rouge"><div class="highlight"><pre class="highlight"><code><span class="k">tell</span><span class="w"> </span><span class="nb">application</span><span class="w"> </span><span class="s2">"OmniFocus"</span><span class="w">
  </span><span class="k">tell</span><span class="w"> </span><span class="nb">front</span><span class="w"> </span><span class="na">document</span><span class="w">
    </span><span class="k">tell</span><span class="w"> </span><span class="na">content</span><span class="w"> </span><span class="k">of</span><span class="w"> </span><span class="na">document</span><span class="w"> </span><span class="na">window</span><span class="w"> </span><span class="mi">1</span><span class="w"> </span><span class="c1">-- (first document window whose index is 1)</span><span class="w">
      </span><span class="k">set</span><span class="w"> </span><span class="nv">theSelectedItems</span><span class="w"> </span><span class="k">to</span><span class="w"> </span><span class="nv">value</span><span class="w"> </span><span class="k">of</span><span class="w"> </span><span class="nb">every</span><span class="w"> </span><span class="nv">selected</span><span class="w"> </span><span class="nv">tree</span><span class="w">
    </span><span class="k">end</span><span class="w"> </span><span class="k">tell</span><span class="w">
    
    </span><span class="k">repeat</span><span class="w"> </span><span class="nv">with</span><span class="w"> </span><span class="nv">anItem</span><span class="w"> </span><span class="k">in</span><span class="w"> </span><span class="k">my</span><span class="w"> </span><span class="nv">theSelectedItems</span><span class="w">
      </span><span class="k">if</span><span class="w"> </span><span class="nv">note</span><span class="w"> </span><span class="k">of</span><span class="w"> </span><span class="nv">anItem</span><span class="w"> </span><span class="ow">contains</span><span class="w"> </span><span class="s2">"Message-ID"</span><span class="w"> </span><span class="k">then</span><span class="w">
        
        </span><span class="k">set</span><span class="w"> </span><span class="nv">noteBody</span><span class="w"> </span><span class="k">to</span><span class="w"> </span><span class="nv">note</span><span class="w"> </span><span class="k">of</span><span class="w"> </span><span class="nv">anItem</span><span class="w">
        
        </span><span class="k">set</span><span class="w"> </span><span class="nv">MessageID</span><span class="w"> </span><span class="k">to</span><span class="w"> </span><span class="nb">do shell script</span><span class="w"> </span><span class="s2">"echo '"</span><span class="w"> </span><span class="o">&amp;</span><span class="w"> </span><span class="nv">noteBody</span><span class="w"> </span><span class="o">&amp;</span><span class="w"> </span><span class="s2">"' | /usr/bin/python ~/bin/message_id.py"</span><span class="w">
        
        </span><span class="k">tell</span><span class="w"> </span><span class="nb">application</span><span class="w"> </span><span class="s2">"iTerm"</span><span class="w">
          </span><span class="nb">activate</span><span class="w">
          </span><span class="k">try</span><span class="w">
            </span><span class="k">set</span><span class="w"> </span><span class="nv">newTab</span><span class="w"> </span><span class="k">to</span><span class="w"> </span><span class="nb">true</span><span class="w">
            </span><span class="k">set</span><span class="w"> </span><span class="nv">t</span><span class="w"> </span><span class="k">to</span><span class="w"> </span><span class="nb">the</span><span class="w"> </span><span class="nb">first</span><span class="w"> </span><span class="na">window</span><span class="w">
          </span><span class="nb">on</span><span class="w"> </span><span class="k">error</span><span class="w">
            </span><span class="k">set</span><span class="w"> </span><span class="nv">newTab</span><span class="w"> </span><span class="k">to</span><span class="w"> </span><span class="nb">false</span><span class="w">
            </span><span class="k">set</span><span class="w"> </span><span class="nv">t</span><span class="w"> </span><span class="k">to</span><span class="w"> </span><span class="p">(</span><span class="nv">create</span><span class="w"> </span><span class="na">window</span><span class="w"> </span><span class="nv">with</span><span class="w"> </span><span class="nv">default</span><span class="w"> </span><span class="nv">profile</span><span class="p">)</span><span class="w">
          </span><span class="k">end</span><span class="w"> </span><span class="k">try</span><span class="w">
          
          </span><span class="k">tell</span><span class="w"> </span><span class="nv">t</span><span class="w">
            </span><span class="k">if</span><span class="w"> </span><span class="nv">newTab</span><span class="w"> </span><span class="k">then</span><span class="w">
              </span><span class="k">set</span><span class="w"> </span><span class="nv">tt</span><span class="w"> </span><span class="k">to</span><span class="w"> </span><span class="p">(</span><span class="nv">create</span><span class="w"> </span><span class="nb">tab</span><span class="w"> </span><span class="nv">with</span><span class="w"> </span><span class="nv">default</span><span class="w"> </span><span class="nv">profile</span><span class="p">)</span><span class="w">
            </span><span class="k">else</span><span class="w">
              </span><span class="k">set</span><span class="w"> </span><span class="nv">tt</span><span class="w"> </span><span class="k">to</span><span class="w"> </span><span class="p">(</span><span class="nv">current</span><span class="w"> </span><span class="nb">tab</span><span class="w"> </span><span class="k">of</span><span class="w"> </span><span class="nv">t</span><span class="p">)</span><span class="w">
            </span><span class="k">end</span><span class="w"> </span><span class="k">if</span><span class="w">
            
            </span><span class="k">set</span><span class="w"> </span><span class="nv">s</span><span class="w"> </span><span class="k">to</span><span class="w"> </span><span class="nv">current</span><span class="w"> </span><span class="nv">session</span><span class="w"> </span><span class="k">of</span><span class="w"> </span><span class="nv">tt</span><span class="w">
            
            </span><span class="c1">-- Open Mutt</span><span class="w">
            </span><span class="k">tell</span><span class="w"> </span><span class="nv">s</span><span class="w">
              </span><span class="nb">write</span><span class="w"> </span><span class="nb">text</span><span class="w"> </span><span class="s2">"/usr/local/bin/mutt"</span><span class="w">
            </span><span class="k">end</span><span class="w"> </span><span class="k">tell</span><span class="w">
            
            </span><span class="c1">-- Run "F8" keypress</span><span class="w">
            </span><span class="k">tell</span><span class="w"> </span><span class="nb">application</span><span class="w"> </span><span class="s2">"System Events"</span><span class="w">
              </span><span class="na">key code</span><span class="w"> </span><span class="mi">100</span><span class="w">
            </span><span class="k">end</span><span class="w"> </span><span class="k">tell</span><span class="w">
            
            </span><span class="c1">-- Search for the MessageID</span><span class="w">
            </span><span class="k">tell</span><span class="w"> </span><span class="nv">s</span><span class="w">
              </span><span class="nb">write</span><span class="w"> </span><span class="nb">text</span><span class="w"> </span><span class="s2">"id:"</span><span class="w"> </span><span class="o">&amp;</span><span class="w"> </span><span class="nv">MessageID</span><span class="w">
            </span><span class="k">end</span><span class="w"> </span><span class="k">tell</span><span class="w">
            
            </span><span class="c1">-- Wait one second, then hit 'enter' to open the email</span><span class="w">
            </span><span class="nb">delay</span><span class="w"> </span><span class="mi">2</span><span class="w">
            </span><span class="k">tell</span><span class="w"> </span><span class="nb">application</span><span class="w"> </span><span class="s2">"System Events"</span><span class="w">
              </span><span class="na">key code</span><span class="w"> </span><span class="mi">36</span><span class="w">
            </span><span class="k">end</span><span class="w"> </span><span class="k">tell</span><span class="w">
          </span><span class="k">end</span><span class="w"> </span><span class="k">tell</span><span class="w">
        </span><span class="k">end</span><span class="w"> </span><span class="k">tell</span><span class="w">
      </span><span class="k">else</span><span class="w">
        </span><span class="k">if</span><span class="w"> </span><span class="nv">note</span><span class="w"> </span><span class="k">of</span><span class="w"> </span><span class="nv">anItem</span><span class="w"> </span><span class="ow">is</span><span class="w"> </span><span class="s2">""</span><span class="w"> </span><span class="k">then</span><span class="w">
          </span><span class="k">set</span><span class="w"> </span><span class="nv">dialogText</span><span class="w"> </span><span class="k">to</span><span class="w"> </span><span class="s2">"No text in note"</span><span class="w">
        </span><span class="k">else</span><span class="w">
          </span><span class="k">set</span><span class="w"> </span><span class="nv">dialogText</span><span class="w"> </span><span class="k">to</span><span class="w"> </span><span class="s2">"Note does not appear correctly formatted: missing Message-ID"</span><span class="w">
        </span><span class="k">end</span><span class="w"> </span><span class="k">if</span><span class="w">
        </span><span class="nb">display dialog</span><span class="w"> </span><span class="nv">dialogText</span><span class="w"> </span><span class="nv">with</span><span class="w"> </span><span class="nv">icon</span><span class="w"> </span><span class="nb">stop</span><span class="w"> </span><span class="se">¬
</span><span class="w">          </span><span class="nv">with</span><span class="w"> </span><span class="na">title</span><span class="w"> </span><span class="se">¬
</span><span class="w">          </span><span class="s2">"Error"</span><span class="w"> </span><span class="nb">buttons</span><span class="w"> </span><span class="p">{</span><span class="s2">"OK"</span><span class="p">}</span><span class="w"> </span><span class="se">¬
</span><span class="w">          </span><span class="nv">default</span><span class="w"> </span><span class="nb">button</span><span class="w"> </span><span class="mi">1</span><span class="w">
        
      </span><span class="k">end</span><span class="w"> </span><span class="k">if</span><span class="w">
    </span><span class="k">end</span><span class="w"> </span><span class="k">repeat</span><span class="w">
  </span><span class="k">end</span><span class="w"> </span><span class="k">tell</span><span class="w">
</span><span class="k">end</span><span class="w"> </span><span class="k">tell</span><span class="w">

</span><span class="nb">return</span><span class="w">
</span></code></pre></div></div>

<p>This AppleScript relies on a script called <code class="language-plaintext highlighter-rouge">message_id.py</code>:</p>

<div class="language-python highlighter-rouge"><div class="highlight"><pre class="highlight"><code><span class="c1">#!/usr/bin/python
#
#    mutt_flagged_vfolder_jump.py
#
#    Generates mutt command file to jump to the source of a symlinked mail
#
#    Copyright (C) 2009 Georg Lutz &lt;georg AT NOSPAM georglutz DOT de&gt;
#
#    This program is free software: you can redistribute it and/or modify
#    it under the terms of the GNU General Public License as published by
#    the Free Software Foundation, either version 3 of the License, or
#    (at your option) any later version.
#
#    This program is distributed in the hope that it will be useful,
#    but WITHOUT ANY WARRANTY; without even the implied warranty of
#    MERCHANTABILITY or FITNESS FOR A PARTICULAR PURPOSE.  See the
#    GNU General Public License for more details.
#
#    You should have received a copy of the GNU General Public License
#    along with this program.  If not, see &lt;http://www.gnu.org/licenses/&gt;.
</span>
<span class="kn">import</span> <span class="nn">optparse</span>
<span class="kn">import</span> <span class="nn">os</span>
<span class="kn">import</span> <span class="nn">re</span>
<span class="kn">import</span> <span class="nn">sys</span>
<span class="kn">import</span> <span class="nn">types</span>
<span class="kn">from</span> <span class="nn">subprocess</span> <span class="kn">import</span> <span class="n">call</span>
<span class="kn">from</span> <span class="nn">email.header</span> <span class="kn">import</span> <span class="n">decode_header</span>

<span class="n">VERSIONSTRING</span> <span class="o">=</span> <span class="s">"0.1"</span>


<span class="k">def</span> <span class="nf">parseMessageId</span><span class="p">(</span><span class="nb">file</span><span class="p">):</span>
    <span class="s">'''Returns the message id for a given file. It is assumed that file represents a valid RFC822 message'''</span>
    <span class="n">prog</span> <span class="o">=</span> <span class="n">re</span><span class="p">.</span><span class="nb">compile</span><span class="p">(</span><span class="s">"^Message-ID: (.+)"</span><span class="p">,</span> <span class="n">re</span><span class="p">.</span><span class="n">IGNORECASE</span><span class="p">)</span>
    <span class="n">prog2</span> <span class="o">=</span> <span class="n">re</span><span class="p">.</span><span class="nb">compile</span><span class="p">(</span><span class="s">"^Subject: (.*)$"</span><span class="p">,</span>  <span class="n">re</span><span class="p">.</span><span class="n">IGNORECASE</span><span class="p">)</span>
    <span class="n">msgId</span> <span class="o">=</span> <span class="s">""</span>
    <span class="n">subject</span> <span class="o">=</span> <span class="s">""</span>
    <span class="k">for</span> <span class="n">line</span> <span class="ow">in</span> <span class="nb">file</span><span class="p">:</span>
       <span class="c1"># Stop after Header
</span>  <span class="k">if</span> <span class="nb">len</span><span class="p">(</span><span class="n">line</span><span class="p">)</span> <span class="o">&lt;</span> <span class="mi">2</span><span class="p">:</span>
      <span class="k">break</span>
  <span class="n">result</span> <span class="o">=</span> <span class="n">prog</span><span class="p">.</span><span class="n">search</span><span class="p">(</span><span class="n">line</span><span class="p">)</span>
  <span class="n">l</span> <span class="o">=</span> <span class="nb">len</span><span class="p">(</span><span class="n">decode_header</span><span class="p">(</span><span class="n">line</span><span class="p">))</span>
  <span class="n">s</span> <span class="o">=</span> <span class="s">""</span>
  <span class="k">for</span> <span class="n">i</span> <span class="ow">in</span> <span class="nb">range</span><span class="p">(</span><span class="mi">0</span><span class="p">,</span><span class="n">l</span><span class="p">):</span>
    <span class="n">s</span> <span class="o">+=</span> <span class="n">decode_header</span><span class="p">(</span><span class="n">line</span><span class="p">)[</span><span class="n">i</span><span class="p">][</span><span class="mi">0</span><span class="p">]</span> <span class="o">+</span> <span class="s">" "</span>
  <span class="n">s</span> <span class="o">=</span> <span class="n">s</span><span class="p">[:</span><span class="o">-</span><span class="mi">1</span><span class="p">]</span>
        <span class="n">result2</span> <span class="o">=</span> <span class="n">prog2</span><span class="p">.</span><span class="n">search</span><span class="p">(</span><span class="n">s</span><span class="p">)</span>
  <span class="k">if</span> <span class="nb">type</span><span class="p">(</span><span class="n">result</span><span class="p">)</span> <span class="o">!=</span> <span class="n">types</span><span class="p">.</span><span class="n">NoneType</span> <span class="ow">and</span> <span class="nb">len</span><span class="p">(</span><span class="n">result</span><span class="p">.</span><span class="n">groups</span><span class="p">())</span> <span class="o">==</span> <span class="mi">1</span><span class="p">:</span>
      <span class="n">msgId</span> <span class="o">=</span> <span class="n">result</span><span class="p">.</span><span class="n">groups</span><span class="p">()[</span><span class="mi">0</span><span class="p">]</span>
  <span class="k">if</span> <span class="nb">type</span><span class="p">(</span><span class="n">result2</span><span class="p">)</span> <span class="o">!=</span> <span class="n">types</span><span class="p">.</span><span class="n">NoneType</span> <span class="ow">and</span> <span class="nb">len</span><span class="p">(</span><span class="n">result2</span><span class="p">.</span><span class="n">groups</span><span class="p">())</span> <span class="o">==</span> <span class="mi">1</span><span class="p">:</span>
      <span class="n">subject</span> <span class="o">=</span> <span class="n">result2</span><span class="p">.</span><span class="n">groups</span><span class="p">()[</span><span class="mi">0</span><span class="p">]</span>
  <span class="k">if</span> <span class="n">subject</span> <span class="o">!=</span> <span class="s">""</span> <span class="ow">and</span> <span class="n">msgId</span> <span class="o">!=</span> <span class="s">""</span><span class="p">:</span>
      <span class="n">prog3</span> <span class="o">=</span> <span class="n">re</span><span class="p">.</span><span class="nb">compile</span><span class="p">(</span><span class="s">"([\[\(] *)?(RE|FWD?) *([-:;)\]][ :;\])-]*|$)|\]+ .*$"</span><span class="p">,</span> <span class="n">re</span><span class="p">.</span><span class="n">IGNORECASE</span><span class="p">)</span>
      <span class="n">result3</span> <span class="o">=</span> <span class="n">prog3</span><span class="p">.</span><span class="n">sub</span><span class="p">(</span><span class="s">''</span><span class="p">,</span> <span class="n">subject</span><span class="p">)</span>
      <span class="n">subject</span> <span class="o">=</span> <span class="n">result3</span>
      <span class="k">break</span>
    <span class="k">return</span> <span class="p">(</span><span class="n">subject</span><span class="p">.</span><span class="n">replace</span><span class="p">(</span><span class="s">'</span><span class="se">\n</span><span class="s">'</span><span class="p">,</span><span class="s">''</span><span class="p">),</span> <span class="n">msgId</span><span class="p">.</span><span class="n">strip</span><span class="p">(</span><span class="s">"&lt;&gt;"</span><span class="p">))</span>

<span class="n">subject</span><span class="p">,</span> <span class="n">msgId</span> <span class="o">=</span> <span class="n">parseMessageId</span><span class="p">(</span><span class="n">sys</span><span class="p">.</span><span class="n">stdin</span><span class="p">)</span>
<span class="k">try</span><span class="p">:</span>
  <span class="k">print</span> <span class="n">msgId</span>
<span class="k">except</span> <span class="nb">KeyboardInterrupt</span><span class="p">:</span>
  <span class="k">print</span> <span class="s">""</span>
  <span class="n">sys</span><span class="p">.</span><span class="nb">exit</span><span class="p">()</span>

</code></pre></div></div>

<h1 id="result">Result</h1>
<p>After this, you should be able to see your email and integrate it across your other workflows. I’m not posting my inbox (the shame of never being able to reach inbox zero in inescapable!), so please enjoy this image of my RSS reader and a web browser running side by side in <code class="language-plaintext highlighter-rouge">tmux</code>, to whet your appetite for the next post in this series.
<img src="/assets/images/2021-07-30-os-x-vt220/0C1A2941.jpg" alt="shot of VT220 displaying news feeds on the left hand side of the screen, and a text-only browser displaying google.com on the right" /></p>

<h1 id="up-next-in-the-series">Up Next in the Series</h1>
<p><a href="/archives/734">Applications for daily use: RSS, web and terminal security</a></p>]]></content><author><name></name></author><category term="Computing" /><category term="vt220" /><category term="vt510" /><category term="command line" /><category term="automation" /><summary type="html"><![CDATA[This post is the second in a series on my integration with a VT220-like (VT510) terminal, as my ‘daily driver’. The first post in this series is available here.]]></summary></entry></feed>